First, as we are getting ready for Thanksgiving, Christmas, winter, etc. Heather and I would like to feature quilts leading up to each holiday that are the appropriate colors, themes, feeling etc.. If you have a quilt that would fit into these category please send us an email with the link! (myquiltstory[at]gmail[dot]com) Also if you know of a quilt that should be featured send us a link or picture and we'll get in touch with them. Thanks!
Remember these HSTs? I'm ready to share the rest.
HST Quilt Tutorial Part 2
HST Quilt Tutorial Part 2
I got those beautiful Joel Dewberry Modern Meadow fabric from Treasure Bay Fabrics. Really great little etsy shop...I just went over and saw this most darling fabric, don't you think?!?
Want a sneak peek of the quilt?
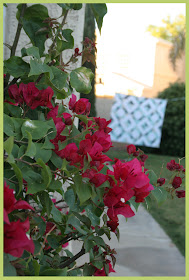
Don't you love these beautiful flowers? ;)
Down to the nitty gritty. We left off with 120 HST's. Here is the first block you will assemble.
Remember to "square up" after each step. Basically making sure each time you sew then you trim to make sure everything is straight and measuring correctly.
Click on the image to enlarge.
Repeat this block 6 times.
Here is a finished block in fabric.
Now, you could choose to do this block 9 times (or 12 or 16...) and would result in a beautiful square quilt. I wanted my lap quilt to be rectangular.
Therefore, the remaining HSTs I made into "half" blocks and this is how I constructed them.
Click on photo to enlarge.
And a tip.
Your lucky day.
For those of us who have wee ones, or not a designated craft room, or don't have a design board...basically you can't leave your blocks laid out. I use masking tap and mark the block with it's location...being careful to mark each block in the same spot (for me, top right corner).
This way every night I could stack them back up again and not feel panicked that I'd forget the order or lose all my work.
I've never left the tape on for more than 24 hours nor has it been in extreme heat/cold. So just use caution with these beautiful quilts!
Okay do you just want to see the whole quilt top?
Oh fine :)
Refer to the picture for quilt block layout.
Piecing blocks first by row, and then sewing all rows together.
Finished quilt size 50" x 60"
I've seen this layout around and I really wanted to give it a try. Some people have called it a geometric squares quilt...but when I hear/see "geometric" I just want to put my fingers in my ears and "la la la la". For now I'll just call it a HST quilt.
Hope you like the layout and hope you give it a try!
See you tomorrow for another QuiltStory!


Fons & Porter make little block markers where you can write the row/column number...I always pin the marker tag to the top left corner so I know which way to orient that block. I got a huge pack of them at Tuesday Morning for a couple of dollars. It's a pain but not as bad as having to reconfigure a complex layout.
ReplyDeleteAwesome, I love how this looks! :) As soon as I can find the time, I definitely want to try this out with my aqua and red stash :)
ReplyDeleteWHOOOOOOOO! This is beautiful - I just might be re-thinking my next quilt project!
ReplyDeleteQuick question, how are you pressing your seams? I'm a new quilter and always enjoy hearing how people do this. Also, what is the size of a finished block? If my math is correct it is 20", but I've never been very good at math.
ReplyDeleteI've been putting off trying triangles for a long time. This BEE-YOU-TEE-FUL quilt, just might be the one that gets me going on one. I absolutely love it!
ReplyDeleteIt's beautiful - I'd call it Double Diamonds!
ReplyDeletetq for sharing... very beautiful piece you have there!
ReplyDeletegood work meg, it looks great! those HSTs are a lot of work and cutting huh? so worth it though.
ReplyDeletexo love ya
loving this quilt!
ReplyDeletePaula...yes the finished block size would be 20" (technically 20.5" but once the whole quilt is together 20"). Also I have been ironing my seams through the middle, one to each side. Heather recently made a runner and since she knew where each block would go she could iron them to opposite sides...I had no idea where my blocks would be. Also I didn't want to press the the darker fabric as I usually do because I had white touching white, so I just decided easiest way to go was down the middle! :)
ReplyDeleteThis is gorgeous! I just stumbled on this and love it. Now I know what to do with my Parisville!!
ReplyDeleteThanks for posting this....I'm a new quilter and this is just the type of project I needed!
ReplyDeleteregarding putting away quilt pieces: I have used a flannel backed "vinyl" tablecloth for my "design board". it can be rolled or folded up and when unrolled, the pieces are near the same place b/c they stick to the flannel and not the plastic -such a time saver than having to lay out the blocks over and over again.
ReplyDeleteHow do you put the "half" blocks together for their row? I just can't get my head around it, which probably means it is very simple and I just can't see it.
ReplyDelete