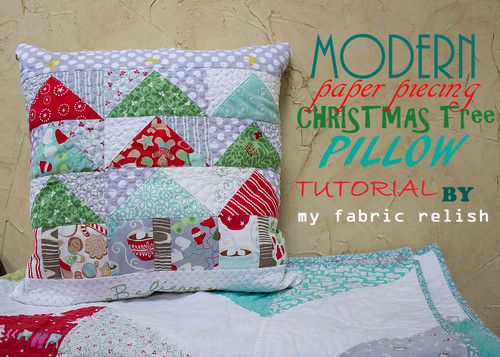
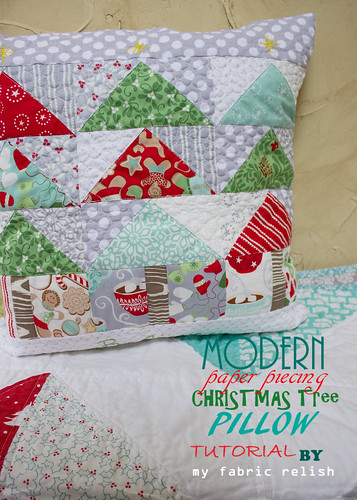
Modern Paper Piecing Christmas Tree Pillow: A Tutorial by Melissa at My Fabric Relish
I am so excited to get to play along with Heather and Megan's Holiday Tutorial Series here at Quilt Story today and I have a fun foundation paper piecing tutorial to share with a free pattern included!
Lets get started!

1. Gather Supplies:
- Charm Pack - I used In from the Cold by Kate Spain for Moda
- 1 yard of white/grey/low volume (or you can mix and match)
You will need to cut 2 - 13 1/2 x 18 1/2 inch strips; 9 - 5x5 inch squares; and 1 - 13 1/2 in. square.
- scrap fabrics for wood trunk
- embroidery thread for embellishing
- 21 x 21 inch white muslin (backing for inside of pillow)
- 20 x 20 inch batting
- 1 button

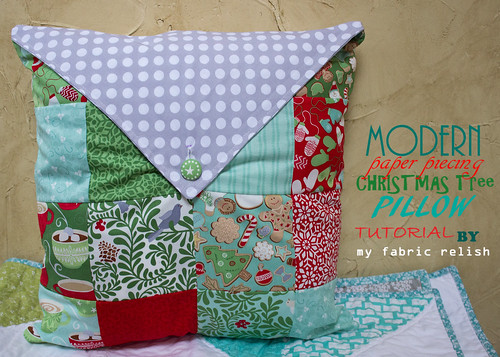
And LOOK! It's reversible!
2. Print 3 copies of the tree template, which equals two pages per tree and six pages all together.
Christmas Tree Template 1 of 2
Christmas Tree Template 2 of 2
3. Tape the pattern together along the red line. Make sure your 1 inch test square is in fact 1 inch.

4. Choosing and cutting fabrics.
- Choose 5-6 of the charm squares and cut in half on the diagonal. These will be your trees.
- For the tree surrounding you will need 9, 5 inch squares. You can pick some low volume from your charm pack or from your yardage. I wanted these to look like falling snow. You will also cut each of these on the diagonal. Now you have a total of 18, 1/2 squares.
- Choose 6 charms from your pack for under the tree. I picked ones that I thought represented things you find under a Christmas tree. :)

5. Now it's time to piece! Yay! If you are new to foundation paper piecing (FPP), there are many tutorials on the web and videos on YouTube. If you are looking for a bit of guidance, check out my blog post here.
IMPORTANT TIP: Since the fabric triangles for the trees are exactly the right size needed, make sure you line up your fabrics along the line no more that 1/4 inch.


6. Now it's time to trim your blocks. Be sure to add a 1/4 seam allowance to each of the blocks (not included in the pattern). See picture below...


7. Once you have made all three, remove the paper, piece together and press seams open.

8. Add your 3 1/2 x 18 1/2 inch borders to the top and bottom and press.
9. Now it's time to make your quilt sandwich. When making pillows, I prefer to using muslin for the backing since no one will see it and it's much cheaper. You can now quilt as you wish. I went for wavy lines on the top and bottom borders to look like snow and then pebbles in between the trees to look like snow falling. I stitched in the ditch around the trees and trunk.
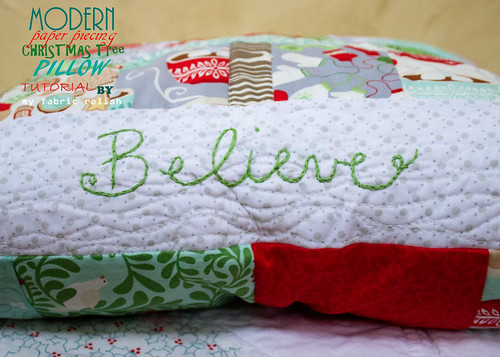
10. Embellish! Once you are happy with the quilting, you can embellish with some hand embroidery or even add beads to the tree to look like lights. I added stars above each of the trees and then "Believe" at the bottom (kind of hard to see when the pillow is sitting up...oh well). I used my disappearing ink marker, but just be sure to test it on your fabric first (which I NEVER do...shame on me!) and spell check your word, too. Oops! Don't worry, I fixed it! haha This will be a good time to trim down your top to 18 x 18 inches. You shouldn't need to trim the sides, just the top and bottom. You need to keep a 1/4 inch on the sides of the trees so you don't loose your points.


11. Making the back: Now set the top aside and it's time to start on the back. Take 16 of the remaining charms and make a 4x4 block. Make a 1/4 hem at the top of the block. If you would rather quilt this portion, you can add binding to just the top and omit the hemming part. I probably should have quilted this part as well, but I was a tad bit short on time.


12. Time to make the envelope lip! Take a 13 1/2 inch square piece of fabric and slice in 1/2 on the diagonal. Put right sides together and sew a 1/4 inch seam along the short, 90 degree sides of the triangle or the "L". Trim the corner, turn inside out, press, and topstitch the "L".


13. Now it's time to make the pillow sandwich! Lay front (trees) of pillow right side up, then envelope lip on the top with the tip pointed towards the bottom (pin a few times here so it doesn't shift), then lastly the back 4x4 block right side down with hem at the top. Pin the heck out of this layer and even use some Clover Wonder Clips if you have them.


14. Sew the pillow together: Sew a 1/4 inch seam around the pillow using a small stitch length (about 2.0) being sure you only catch the front and envelope layer on the top. Hope that makes sense? In other words, you do NOT sew the hemmed end of the back to the envelope and front OR you will stitch the whole thing together!

15. Getting close! Trim the corners on the inside and finish the exposed edges with either a serger or zigzag stitch. Or you can just leave it be. Totally up to you! Turn inside out and start getting excited!
16. Almost done! Time to add your button hole to the back of the pillow at the bottom of the envelope lip. I just took the fabric covered button I made and marked my button hole line and then let my machine work it's magic. If you are scared of button holes or need a refresher, my go to button hole tutorial can be found here by Prudent Baby, but now called Pretty Prudent.
17. EEK! Now stuff that bad boy with a pillow form or make your own and send me a picture ASAP! myfabricrelish {at} gmail {dot} com


Thanks so much!
Melissa @ my fabric relish

Thank you!!!
And come back Friday for another awesome Holiday Tutorial from My Quilt Infatuation!


Super cute!
ReplyDeleteSuch an honor to get to share something on your wonderful blog! Thanks so much for the opportunity! xoxo
ReplyDeleteVery cute idea! I love to have holiday pillows around this time of year!
ReplyDeleteDrop dead gorgeous! :D
ReplyDeleteGreat tutorial Melissa! I'm excited to try out this paper piecing method and I love all the fun FMQ you did.
ReplyDeleteStacy @ freshlyhandmade.com
Love it!! Great tutorial too!! Thanks!
ReplyDeleteHi Melissa! Your pillow is beautiful and you have made great tutorial! I love your idea for closing! x Teje
ReplyDeleteI love that Christmassy pillow! Great tutorial! Love the embroidered details. I need to try this pattern!
ReplyDeleteCute pillow and great tut. Love that envelope closure. Super idea for a quilted Christmas gift.
ReplyDeleteGreat job! Trees are super cute and tutorial is great - thank you!
ReplyDeleteSO cute!! I love that envelope back! Must try this!!
ReplyDeleteWith a slight shift of fabric and focus, this pattern could easily be several houses, and just as cute!
ReplyDeleteดูหนังออนไลน์ It's so good, I like it, I'll share it.
ReplyDelete