REPOST FROM LAST YEAR IN CASE YOU MISSED
Hello. Today I am going to show you a simple Valentine canvas tutorial. This project takes about 1 and a half hours (with 3 littles), uses up fabric scraps, and costs around $5. Easy, cheap, adorable!
I will start by saying this would be really easy with paper and a punch, but I didn't have either. Plus I really like my fabric scrap selection.
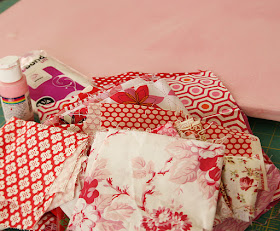
All you need is a 16 x 20 canvas. I got mine from Walmart, 2 pack for $10. You could probably do better at Hobby Lobby with a coupon. You will need scraps, craft paint, mod podge and a brush.
I didn't include a template, but my heart is around 3" high, and 3" wide. I just piled a bunch of scraps together and cut around my template. I probably did to many scraps, because I had to clean the edges up a bit. But I didn't care if the hearts were not all the exact same size. They appear to be, that's all that mattered to me.
First paint your canvas. I did more of a wash. Equal parts water and paint. I spread it around with a rag. After it is dry, lay your hearts in place.
One row at a time, lift the hearts, spread mod podge, place hearts back and "glue" them down. Push tight if you didn't iron first (like me) Then once they are in place and look nice, spread mod podge on top.
Do this to all the rows. Push out any air bubbles (easy do do with fabric) Make sure your edges don't lift either.
Let it dry and hang or prop wherever you like!
Finished and cute! Hope you like!


Super cute!
ReplyDeleteThanks for sharing this again! I'm a new follower and missed it last year. Now I know what to do with some of my scraps from my red quilt!!
ReplyDeleteI'm also a new follower, so thank you for sharing! This is also a great idea not only for Valentines, but also Sewing Room wall decor.
ReplyDeletesuch a cute project! thanks
ReplyDeleteThanks for sharing it again, I, as well, am a newbie to quilting & blogging. This is a very cute project and would be great to have the kids help with!:)
ReplyDeleteThank you for posting this "again". I DID miss it the first time. This is a perfect little project for any holiday or season. Love it! Going to "link you" with my FB page and my blog if I am able to make one right quick! Thanks again.
ReplyDeleteHow cute thanks for sharing!
ReplyDeleteOh I just love this. Thanks for the tut. I'm going to get me some canvas this week and make my own version.
ReplyDeleteSuper cute
ReplyDeleteI'm thinking paper lace doilies in the background
thanks,
Natalie
Super cute
ReplyDeleteI'm thinking paper lace doilies in the background
thanks,
Natalie
I must have missed this one last year so thanks for posting it again! I even have a spare canvas hanging around here somewhere!
ReplyDeleteI must have missed this one last year so thanks for posting it again! I even have a spare canvas hanging around here somewhere!
ReplyDeleteEducational blogs have many stories. Suitable for people who love to read.ดูหนังออนไลน์
ReplyDelete