


As promised I have a tutorial for you of this quilt:

Finished Quilt Size 30.5" x 40.5"
Let me clarify, I received a Go! Baby fabric cutter from Accuquilt to review, but it doesn't mean I have to give a positive review. I made this entire quilt using the fabric cutter, but you do not have to have one to make it...just may be faster if you do. Especially the circles. If you're using the Go! Baby I used the 2.5" die strip cutter and the circles die, 2", 3" and 5".
Materials needed:
Twenty strips (whichever colors and patterns you choose), 2.5" x 44" (see below)
Six white strips, 2.5" x 40.5"
Three 5" circles (main flower)
Three 3" circles (middle flower)
Three 2" circles (center flower)
2 green fabrics, 3" x 5" (large leaves)
3 green fabrics, 3" x 3" (small leaves)
*I provide a template for circles and leaves in a moment*
Edited to add: Some very smart readers had some good insight. You DO NOT need 44" in length (I am so used to yardage I didn't consider otherwise! Ha!) You only NEED 20.5" in length. So a few options, you could make two quilts and cut double white strips. You could use fat quarters. Or you could take 10 strips 2.5" x 44" sewn together as show below, cut down the middle and sew top to bottom.)
Step 1:
Sew the twenty strips together, top to bottom. The finished piece should measure 40.5" x 44".

*shown are cut measurements, not sewn or finished measurements
click to enlarge
Step 2:
Now cut this piece into strips, three 2.5" x 40.5" pieces and two 6.5" x 40.5".

*shown are cut measurements, not sewn or finished measurements
click to enlarge
Step 3:
Sewing side to side, alternate strip pieces and white 2.5" x 40.5" pieces as shown below.
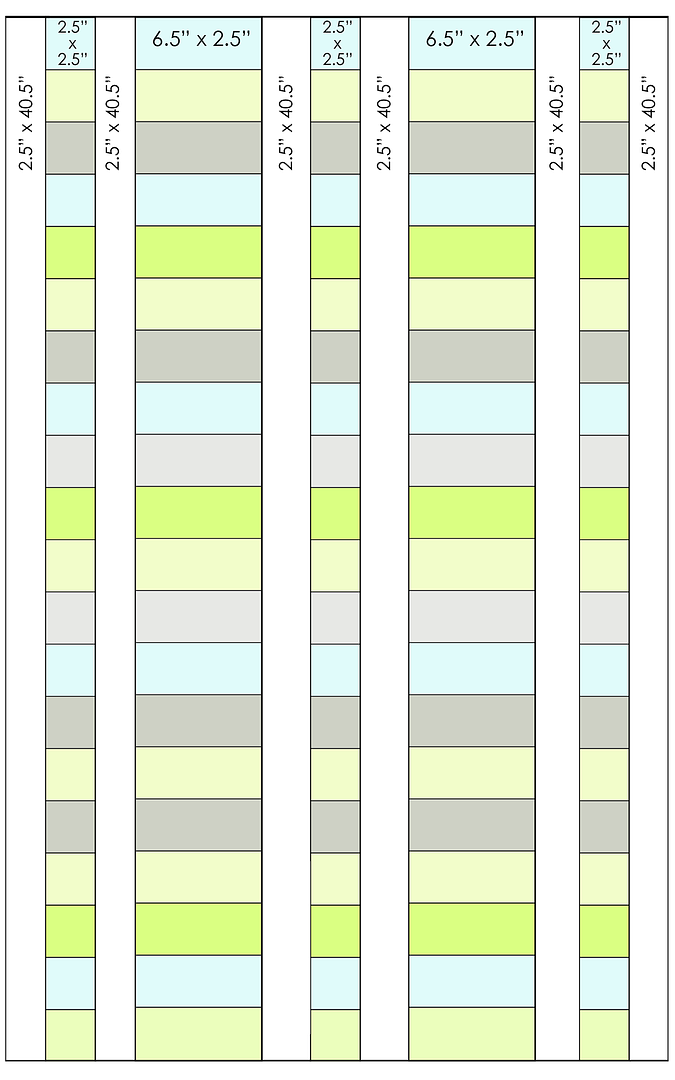
*shown are cut measurements, not sewn or finished measurements
click to enlarge
Step 4:
Applique the flowers and leaves. I used Steam a Seam Lite that I got at Joann. It worked really well, and didn't gunk up my machine. I like that it is thin, I haven't washed it yet but I think this will be my new applique method on quilts. The circle and leaf shapes can be found here.

I have not quilted mine yet, I am waiting until after Market. I will share it as soon as I do!

We would love to know if you use this tutorial. If you see any mistakes or have questions let us know. Please only use this for personal use and not for re-sale. Please include a link to us if you mention this tutorial on your site. Thank you for understanding!


