Photobucket Photobucket Photobucket Photobucket Photobucket Photobucket Photobucket Photobucket Photobucket Photobucket Photobucket Photobucket Photobucket

Wednesday, March 13, 2013

Giant Princess Star Quilt...

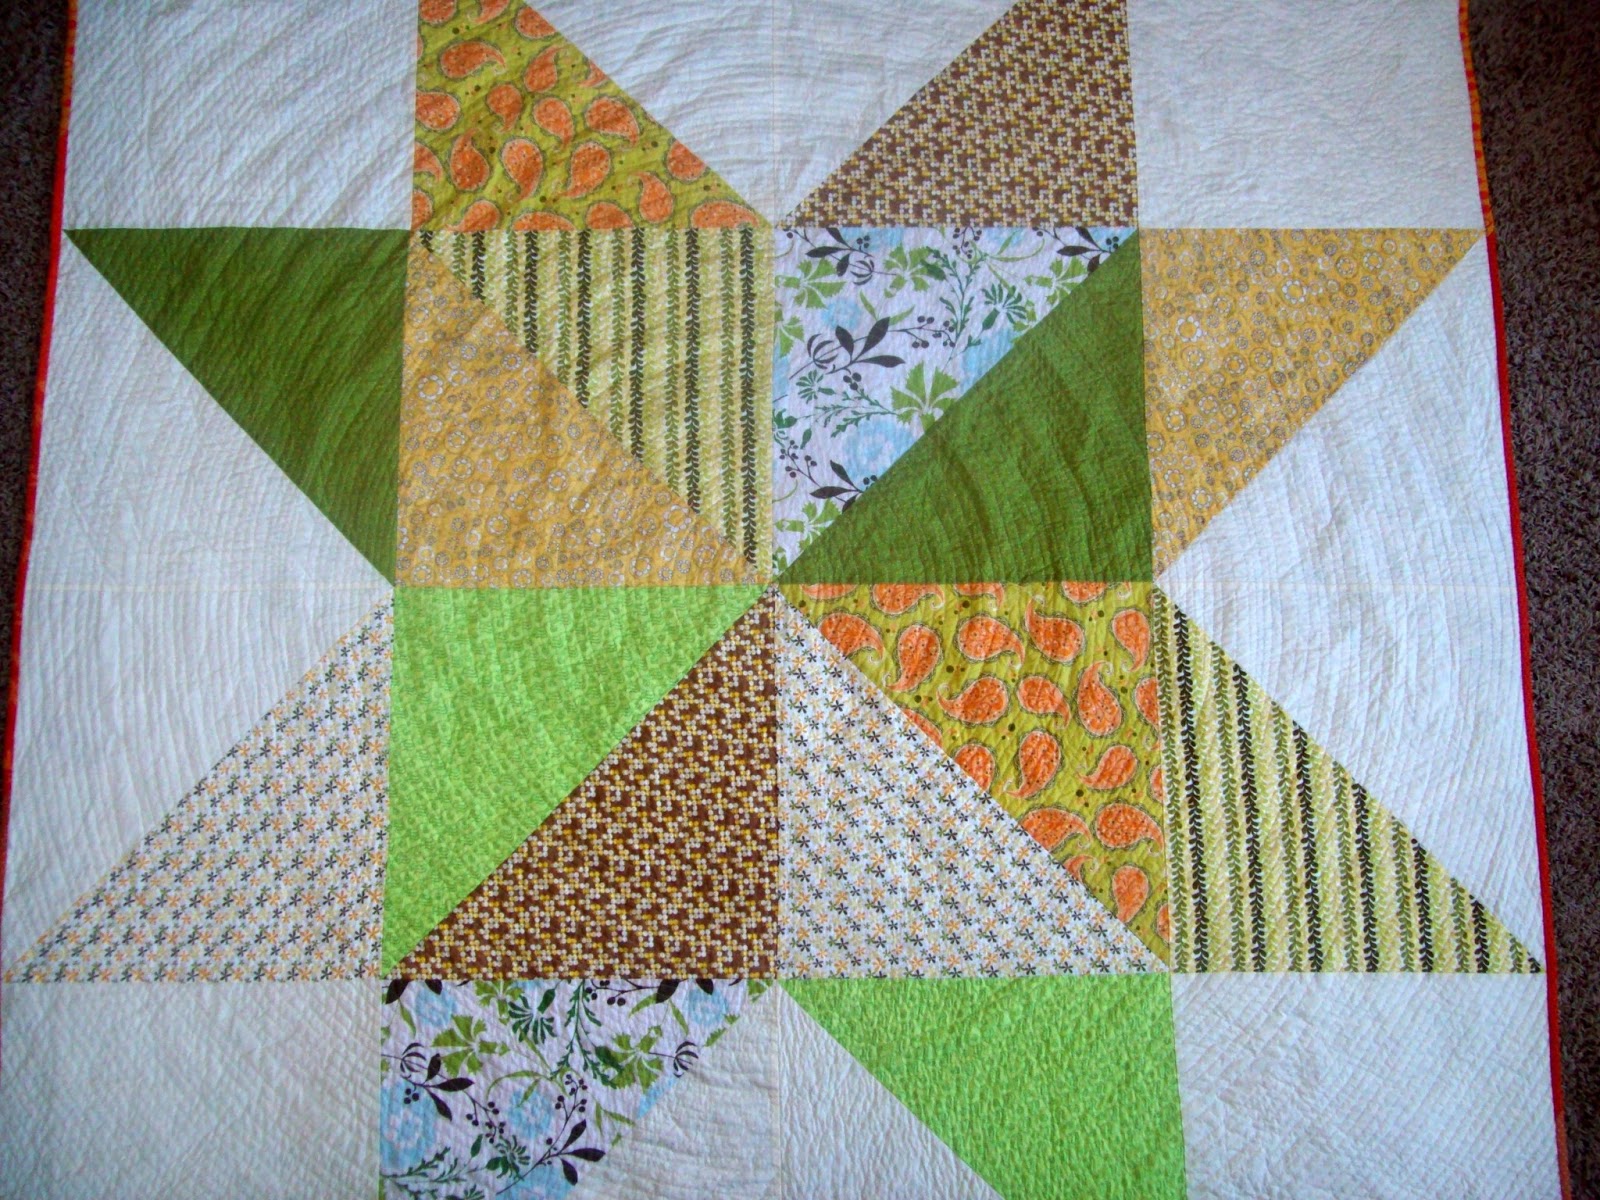
I finished my Giant Star Quilt! 

At the Cabin retreat I just attended, Amy from Diary of a Quilter  made one of these Star Quilts. 

Marion from My Quilt Diet and I got jealous and decided we wanted to make one too...


At one of the activities at the retreat, I won this Michael Miller Princess fat quarter bundle!!! I immediately thought of my sweet five year old Sophie. I call her my Pip lately because she is itty bitty, my own pip squeak. She dresses up several times a day. She has been going nuts for this quilt. She keeps kissing it!


I did some new quilting. I bought Natalia Bonner's Beginner's Guide to free motion quilting. I attempted the swirls. I am super proud. It certainly isn't perfect, don't look to close. I am still really happy with it. I started quilting it too densely, but couldn't change my mind later. It took probably 6 hours to quilt it!


The Star quilt pattern tutorial came from In Color Order. She has the whole tutorial. Really easy and fun!


Heather and Marion's quilts at the retreat...

Marion from My Quilt Diet is a funny lady. She is known for being a speed quilter. She has made over 60 quilts in this last year! (No kidding!) I had all my triangles cut and Marion was helping me with my layout.  Marion decided she too wanted to make one and as we were both working we were teasing that is was a race. But let's be serious, I totally thought I would kill her because I had everything cut and laid out before she even started. Guess who won? Marion!!! By about 20 minutes! I still don't know how she did it, I didn't even pin anything!!!  She is a rockstar! Be sure to check out her Star Quilt today too...

Marions finish...
Love her circle quilting!  Fabulous!


Photobucket

Tuesday, March 12, 2013

Fabric Tuesday!

I somehow deleted my post. But we still have your links. My apologies!


Photobucket

Monday, March 11, 2013

Sew Paint It darling hexagon quilt...

Marianne from Sew Paint It is a lovely blogger from Australia. She is a crafter, quilter, home renovator, furniture re finisher and more crafty things kind of girl. (we could be Bff's!) This entire quilt is hand pieced and hand quilted! Amazing! Be sure to visit Marianne's blog to see some more fun quilts and projects....

I made this quilt a while ago for my little girl.
It is hand pieced and hand quilted.  The fabric is Love u by Deb Strain for moda.  It was made from a jelly roll.  It was the first jelly roll I ever bought so I didn't know much about machine piecing then.  So I cut it all up and made hexagons.
I made up the design.  The pale pink dot fabric is from spotlight and I used two fat quarters of it. That was all I had and I just managed to get enough hexagons out.  I don't know where the white is from but it was in the stash.  It is ribbed and a bit too thick really as it was rather hard to sew.
The backing is ikea fabric and the binding is from delilah by tanya whelan. For the hexagons I do not have a plastic template to work from.  I used word and I drew hexagons and printed out the pages and cut them out.  I tack the fabric to them and do not use adhesive. 
I also made a cushion with the same love u jelly roll.  I just did it random patchwork and quilted it by machine using a swirly freehand pattern.
I did round corners on the quilt and I love them.  It means you have to use bias binding which is a pain, but looks so cute rounded. 
The chair is painted my favourite colour.


Photobucket

Thursday, March 7, 2013

Bunny Foo Foo: Tutorial for Baby

We're always late with giveaway winners...so sorry! Our winner from the awesome HoneyBeGood giveaway:


Tammy said...
I love the new leaf and the stitch by betx white and the soy batting. Thanks for such a great giveaway.
conn_and_vans_mom(at)yahoo(dot)com

CONGRATS!

Okay today is my stop on the Easter Bunny Blog Hop hosted by Lilac Lane!  I have a sweet and simple baby girl outfit to share and a tutorial as well!  Sometimes I call her and sing to her Little Bunny Foo Foo...so the title just fit!


Isn't she so sweet and springy!  And it was around 80 degrees in this picture, so I didn't freeze her :)  Oh her sweet little face...I could stare all day.

On to the tutorial!

Materials Needed:

SKIRT
1 Charm Pack (you may need more depending on child's size, see measurements) 
1/2" to 1" wide elastic
Ric rac trim (optional)

SHIRT
Tee or onesie
Fusible web
Permanent Fabric Glue
1 pom pom

Skirt measurements:
Now the measurements will be according to your child.  If you're making it as a gift there are a lot of references online for sizing.  

For width you want at least double the child's waist, the more you go the fuller the skirt.  This is almost 4 times her waist on my baby's skirt.

For length you want to measure the child from waist to knee (where you'd like it to hit). Add the width of your elastic (ie 1/2", 3/4").  Add 3/4" for waist seam.  Add 1/2" for hem.  Since I was using charms I rounded to the nearest 2 1/2".  (That will make more sense when you see the skirt come together).

Assembly: 

Sew the charms end to end.  I ultimately was going to have 4 rows, so I sewed 2 rows to start. Next you cut the charms in half to get the "brick" effect.  See photos below:


Space the strips to create a brick effect.  Trim off excess on the ends.


Sew ends together to create a continuous piece.


Finish your hem. If your using ric rac, sew the ric rac about 1/2" from the bottom of the hem on the right side of the skirt, see below.


Turn trim under and press.  Sew a top stitch.


Next press down 1/4" from the top of the skirt. Then press down the width of your elastic + 1/2".  Sew around leaving a space to feed the elastic through.


Cut the elastic to the child's waist size (exactly or slightly tight).  Feed through casing just made on the skirt.  Join elastic by overlapping 1/2"-1".  Sew opening closed.


And a darling patchwork skirt in no time!

Bunny Shirt:

Download bunny image here.  Trace onto the fusible web paper and follow the directions to applique to your fabric.  Use a permanent fabric glue to add the pom pom.

Hope you like! Let me know any questions with the tutorial!

She was loving being outside and kicking.  And then she saw the birds and was frozen in awe.  I am so in love with this baby!!!


Stop by to see the other fun projects on the Easter Bunny Blog Hop!


Photobucket