


Bev from Flamingo Toes is one awesome lady! Bev is always coming up with the most unique amazing crafts. Just check out this cute Elf embroidery, see what I mean? Plus she does everything, sews, jewelery, embroidery, decor, recipes, it doesn't end, and she is good at all of it! Make sure to visit her, you won't be sorry. (well maybe you will, because you may spend too much time on her blog)
Hello Quilt Story readers!
I am super excited to be here - I think Megan and Heather are so talented and I'm so honored that asked me to join in their Holiday Series!
I am super excited to be here - I think Megan and Heather are so talented and I'm so honored that asked me to join in their Holiday Series!
My name is Bev and I blog over at Flamingo Toes.

I love doing all sorts of crafting - sewing, embroidery, jewelry, home décor stuff - I'm kind of all over the place. One of my favorite things to sew up are accessories - they are fun to make and they are such great gifts too!
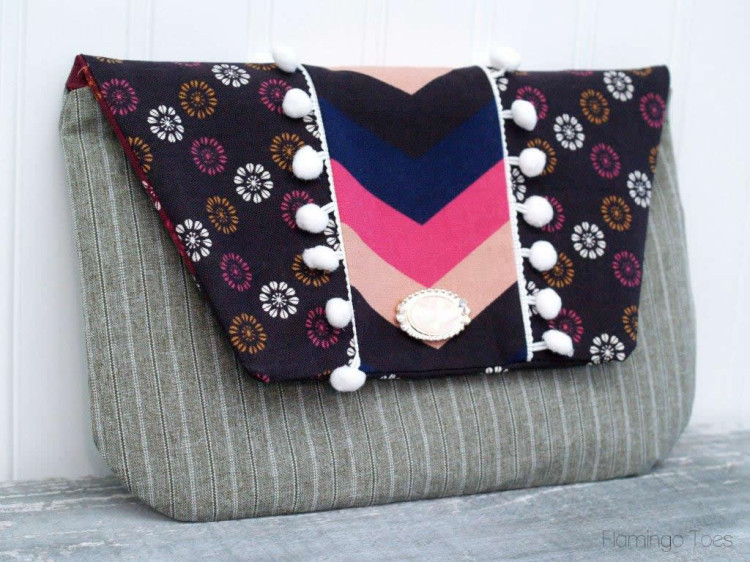
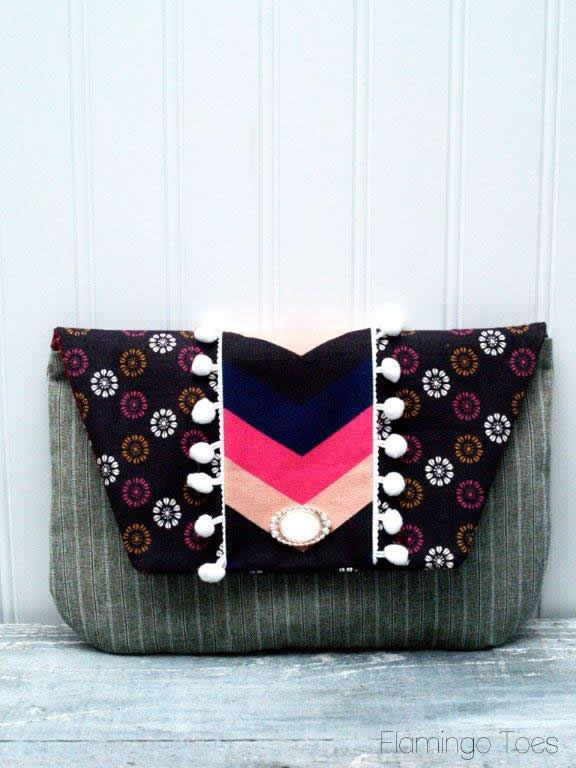
Today I have a super sweet little clutch tutorial for you - this Easy Pom Pom Fold-Over Snap Clutch!
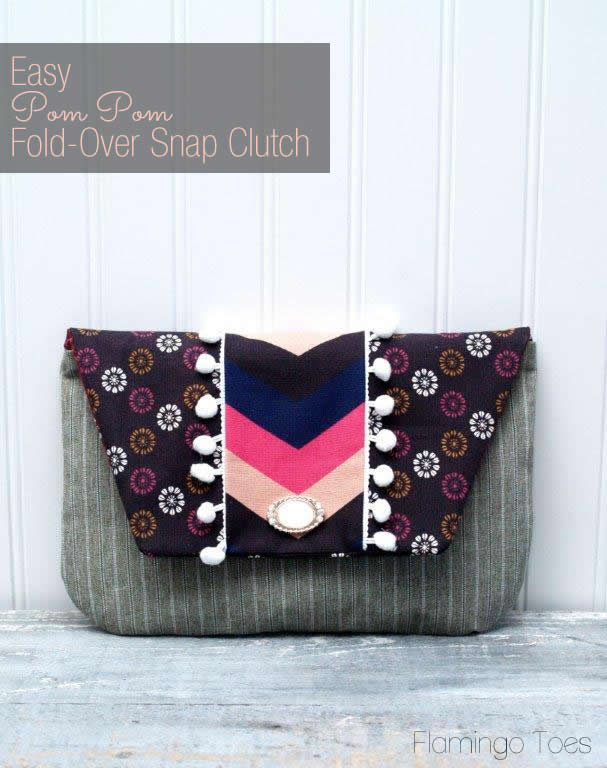
It's a fun combination of prints and pom poms! The front flap is pieced together so you can really play with some fun fabric and trim combos.

It's finished with a cut little bead on the front - and the closure is a snap! Super easy and none of that messing about with zippers.
So let's get started! Here's what you'll need:
• Pattern - click here to download the pattern pieces for the clutch
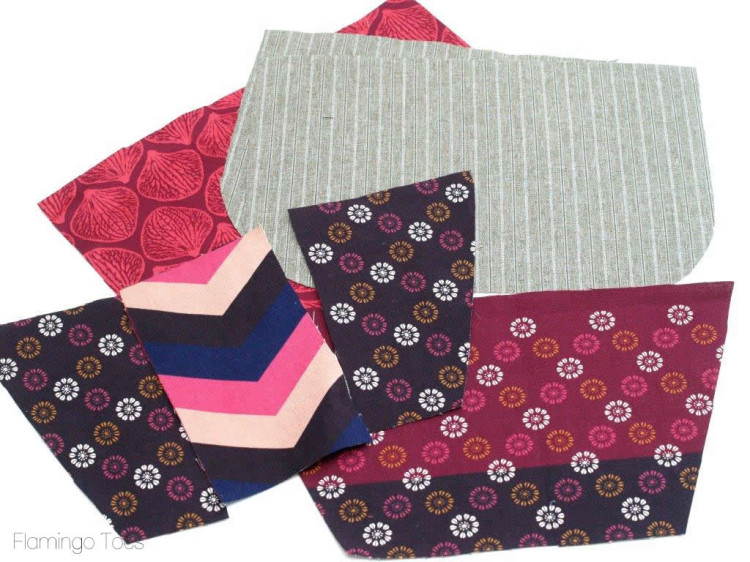
• Fabric for body - 9" x 24"
• Fabric for body lining - 9" x 24"
• Front Flap Fabric - Small pieces
• Front Flap Lining - 9" x 11"
• Trim for front - 10"
• Heavy weight Interfacing - 18" x 24"
• Magnetic snap closure
• Button or bead for front accent (glue or thread to place)
• Fabric for body - 9" x 24"
• Fabric for body lining - 9" x 24"
• Front Flap Fabric - Small pieces
• Front Flap Lining - 9" x 11"
• Trim for front - 10"
• Heavy weight Interfacing - 18" x 24"
• Magnetic snap closure
• Button or bead for front accent (glue or thread to place)
Begin by cutting out your pattern pieces. Pattern is marked for what you will need.
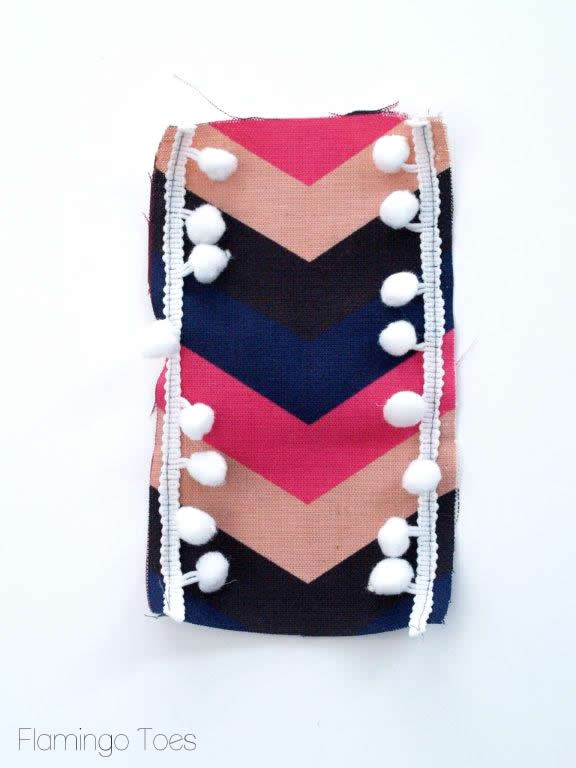
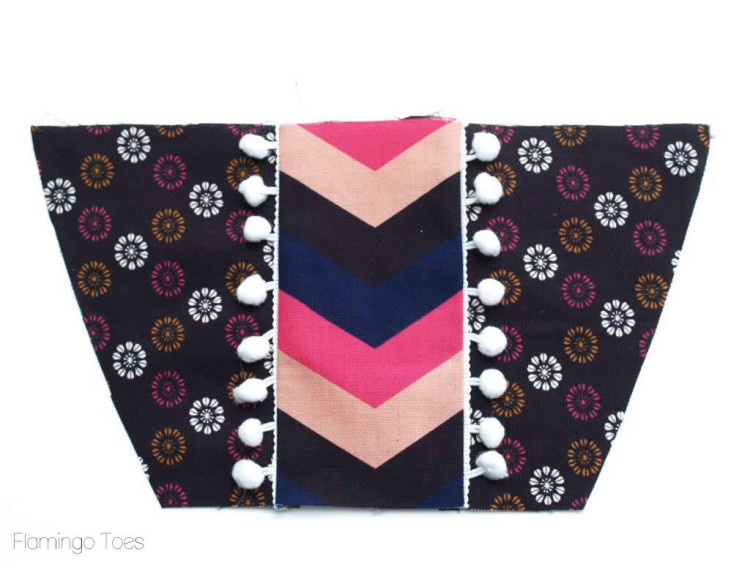
Begin with your front center piece. Cut your trim the length of the piece and sew trim to each side of the center piece with a 1/4" seam allowance.
Sew your front flap side pieces to each side of the center piece with a 3/8" seam allowance. Press the seams towards the center.
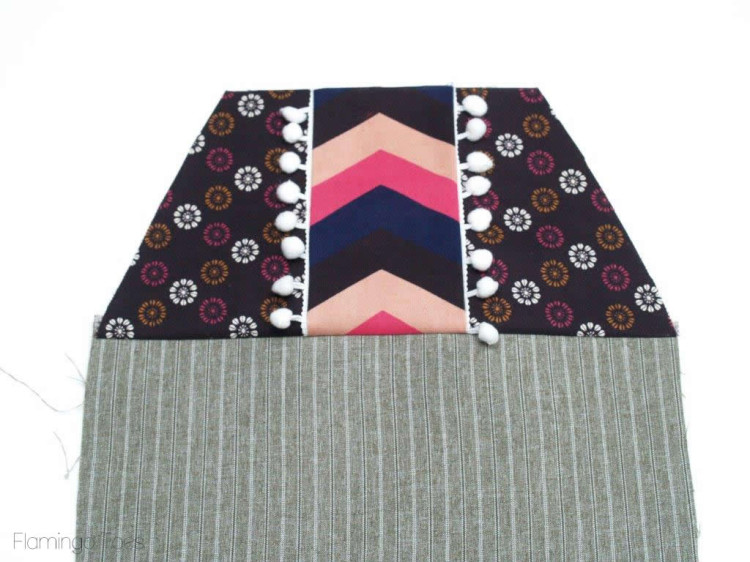
Iron your fusible interfacing to the wrong side of the clutch body pieces and the wrong side of the front flap lining piece. Line up the long side of the front flap piece with the top of one of the body pieces. Sew right sides together with a 3/8" seam allowance.
Press seam towards top piece.
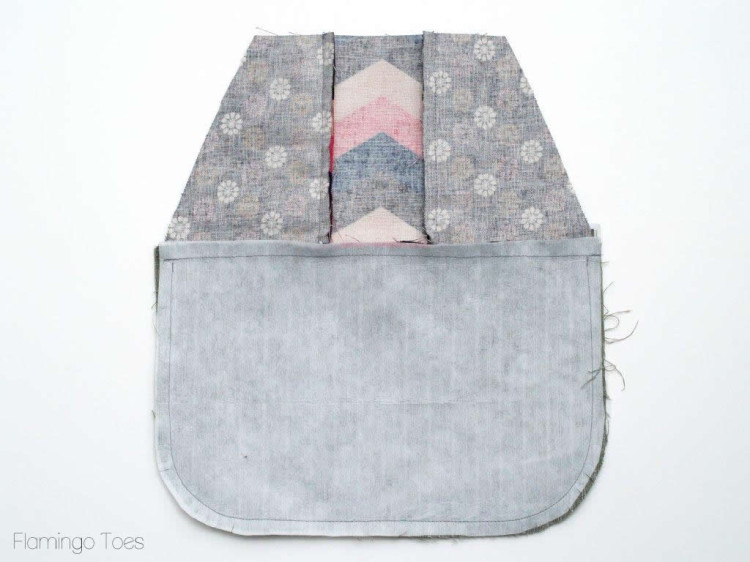
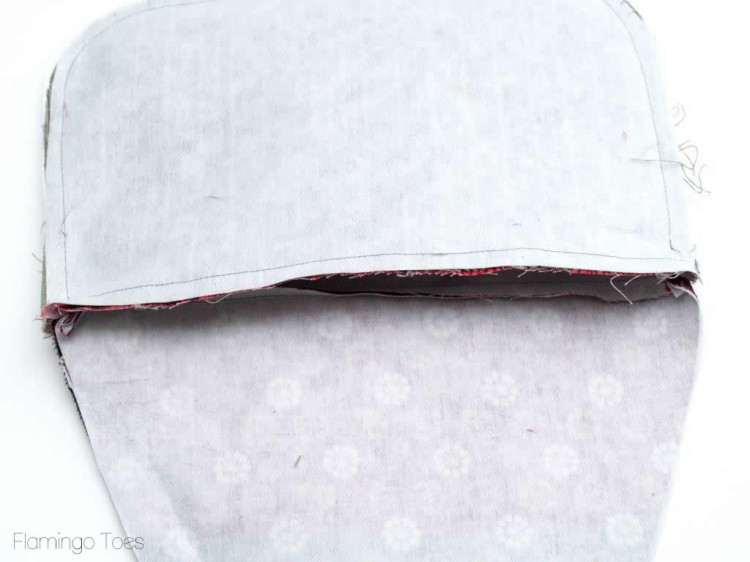
Place the outside body pieces right sides together. Sew around the sides and bottom, starting and ending 3/8" from the top of the piece. Don't sew over the front flap seam. Clip the corners.
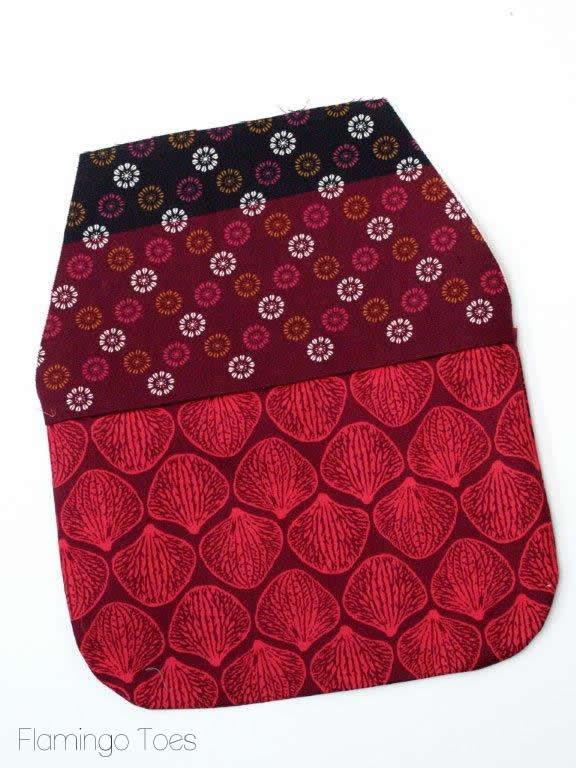
Repeat the assembly steps for the lining, sewing the front flap lining to one piece of the body lining, then sewing the body lining pieces together - but leave a section open on the bottom for turning - about 3".
Turn the lining right side out and press.
Turn the lining right side out and press.
Tuck the lining inside the outer pieces so the right sides are together and the front flap pieces line up. Pin the top edge of the body pieces (not the front flap) together and sew across, stopping at the side seams.
Pin the front flap pieces together and sew the sides and top. Clip the corners.

Turn right side out through the opening in the lining and tuck the lining back into the clutch. Press all the seams.
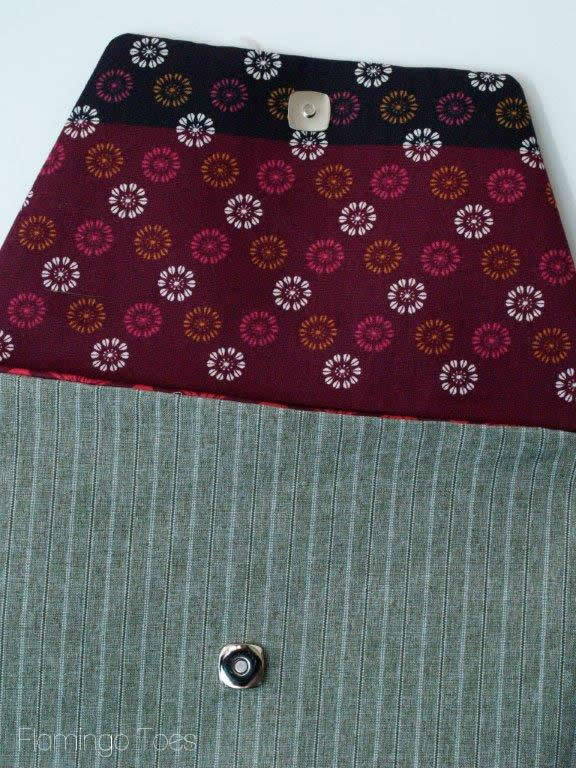
Before sewing the lining closed, mark your placement for the snap. Fold the front flap over and see where you would like the two snap places to be. You'll want the snap on the front flap about 1" from the seam and the matching piece on the body to line up, without pulling at the fabric. Place the snap in place according to the package instructions.
Hand sew your lining opening closed.
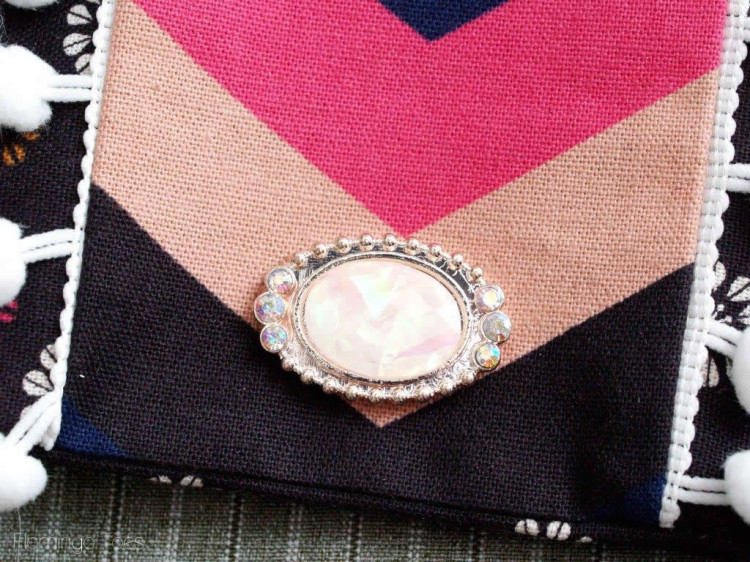
If you would like, you can place a bead, button, or brooch on the front for a decorative addition. I had this pretty light pink bead that went great with the center chevron pattern. I glued it in place with e-6000. If you use glue, let it dry for at least 24 hours before using the clutch.
And now you have a cute new clutch - to keep or give as a gift!
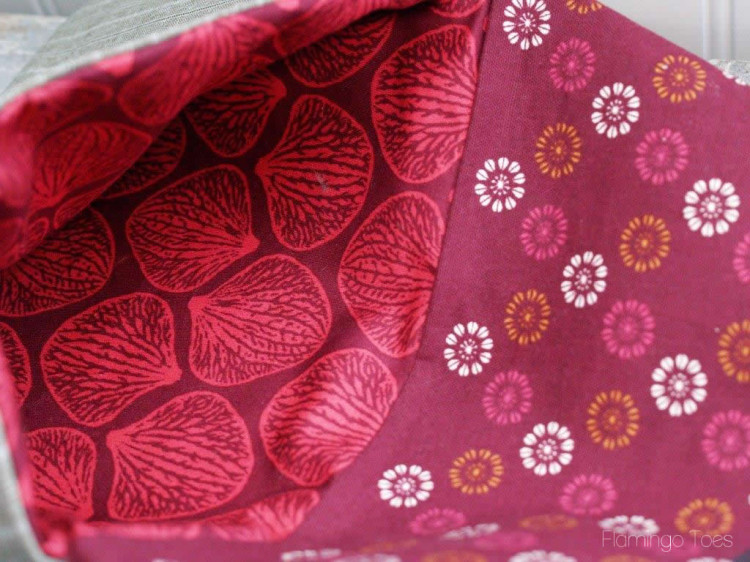
I love that it's almost as pretty inside as it is out.
I hope you like it!
I'd love for you to come on over to Flamingo Toes sometime! You can check out my other Sewing Tutorials here!
Thanks for including me in the series ladies! :)


10 comments:
That is very cute!
Very cute. The link to the pattern works, but there is no pattern for the clutch. (lots of other cool patterns there)
Please let me know how to find the pattern. Thanks.
lol! I always comment my first thought when I look at a picture....very cute....and then I looked and all the other comments are the same!! too funny
Awwww - thank you so much Heather and Megan!! You girls are the sweetest! It was a blast to be a part of the series - thank you!
PS - that pattern is showing up on the Patterns page now - not sure what happened to it earlier. :) Sorry about that!
This is fabulous! I love snap closure and the pretty pompom trim!
I'm an "old" follower of Flamingo Toes. I love Bev's projects, they're brilliant.
Thank you Quilt Story for introducing Flamingo Toes. I really like her tutorials. I found some awesome jewelry ones to fine.
Cute tutorial!
I will check this link. I really need this tutorial. It will be awesome.
ดูหนังออนไลน์ You did a great job writing this blog and it's well written, easy to read, and well organized.
Post a Comment