Photobucket Photobucket Photobucket Photobucket Photobucket Photobucket Photobucket Photobucket Photobucket Photobucket Photobucket Photobucket Photobucket

Showing posts with label owls. Show all posts

Wednesday, June 22, 2011

Owls for Jett from Jaclyn Quilts


I love seeing boy quilts, having two myself I just am drawn to all things boy I guess!  I love seeing new fabrics, color combinations and patterns geared towards the little guy.  I love the quilt that Jaclyn from Jaclyn Quilts created as a gift.  The prints, design and color choices are so great for a little boy, and can grow up with him too! ...AND she has only been sewing for a little more than a year.  WHAT??  I had been sewing for 10 years before I tried to quilt!!  Take a minute to check out her blog and her flickr for some fun modern takes on quilting!
This quilt was made for the son of my wonderful wedding photographer, Nathan Walker. Him and his wife saw some of my quilts and asked if I would make one for their almost 2 year old son and I was happy to do it! Then then told me they wanted twin-sized. Eeeekk! I had second thoughts…actually not really, it was the kick in the pants I needed to try a bigger project.
We went through some fabric and decided on the main fabric and design together. Once again this is a variation on a pattern from Oh, Fransson! I have made this pattern many times, from simple modern baby quilts, because I love the pattern and apparently so does everyone else. So taking Elizabeth Hartman’s basic block I constructed a much larger quilt and improvised the back.
Now that the quilt is safe and sound with its new owners here is how it turned out.
Front:
For Jett (5 of 11)
Back:
For Jett (4 of 11)
Quilting (Done by my favourite long-arm quilter):
For Jett (6 of 11)
Binding and new label:
For Jett (9 of 11)
For Jett (8 of 11)
I really love the way this one turned out and I love the Aviary 2 Wood Grain binding!
For Jett (10 of 11)
I hope they love it too.
For Jett (11 of 11)
Later this weekend I will post about the process of making the quilt.  Complete with rudimentary drawings!

Photobucket

Monday, March 14, 2011

Ticker Tape Owl Quilt, AMAZING!


Val from PinkPlease!  submitted an amazing ticker tape quilt...seriously.  I cannot believe how fabulously she pulled this off, and all from scraps!!  She's brand new to blogging, and based on her less than 20 posts, she's got a lot for us to see :)  I especially love her creative take with this coin quilt, and this darling pillow.  Hop on over and say hi at PinkPlease!


Fabric Scraps!!!  
If you sew, you'll create scraps.  If you've ever seen crazymomquilt's Ticker Tape Quilt, hopefully you've started hording these said scraps in order to make your very own.

This quilt began for me at the Old Red Barn Co. Quilt Along #9 on Flickr.  How this Quilt Along works is that Danaof Old Red Barn Co., chooses a different quilt theme for each round of her Quilt Along. If you choose to participate, you post pictures into the Flickr Group as your quilt progresses.  Dee, of deeroo designs, graciously typed up a tutorial of how to create a Ticker Tape Quilt.

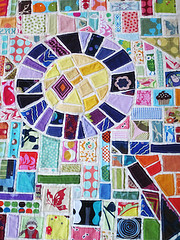
I love Owls and I knew I wanted to incorporate one into this quilt somehow.  I scoured Flickr for inspiration and came across this cute little picture.  I asked the artist if he would mind if I used his image as inspiration for a quilt and he was thrilled. 


I divided this quilt into four quadrants and sewed them all together at the end. The scraps were sewn directly onto a pre-sandwiched (is that a word?) quilt, which allows you to "quilt-as-you-go."  I had never used this technique before, but can I just say that I LOVED IT!!!  It is so refreshing to turn your quilt over, after sewing your little scraps on, to find that you have just quilted it at the same time!!!  The four smaller sections made manuvering around the tiny scraps so much more manageable!  However, not all Ticker Tape Quilts are made this way.  You can also make them the more traditional way by sewing all your scraps onto the quilt top first, then quilting it with the batting and binding.


I was nervous about washing it because I had sewn so close to the edge of each piece (approx. 1/8"), but it came out softer than ever and the pieces all frayed perfectly! 


For the back, I used Valori Wells' Del Hi line.


What I love best about this quilt is that it is like a snapshot in time for me.  Each teeny tiny scrap represents a project that I have made.  Just like a photo album that brings back memories when you look at each pictures, this quilt brings back memories of all the love that I have put into every single project that I have created.  

I encourage everyone who has scraps that they don't want to throw away to use them on a Ticker Tape Quilt.  My next Ticker Tape Quilt will be the Bottled Rainbow Quilt Along with Rachel of StitchedInColor.  It is never to late to join us!  


Lessons learned (if you are using the "pre-sandwiched" quilt method:

If I make  When I make another ticker tape quilt, there is one thing I would do differently.  On the front of each piece, I had left about an inch of white space along the edges of each quadrant so that I could sew them together when they were all finished.  The problem is, once you sew them all together, it looks exactly like you've sewn 4 quadrants together.  I didn't want there to be a distinct line running vertically and horizontally across the quilt drawing attention to these 4 quadrants.  So, I spent a lot of time removing pieces that were close to the middle and putting new pieces on that did not all run in a straight line.  Next time, I will leave 2 inches along the edges to avoid all the seam ripping. 

I also did something a little differently than Dee had in her tutorial which she wanted me to share.  When the time comes to sew the back panel together, Dee has folded one side over the other and hand stitched it down.  I decided to just sew the folded side down as close to the edge as possible (I'm not the biggest hand stitching fan).  If you leave the 2 inch space along the edges like I mentioned above, you won't even see this seam on the front side because you will cover it up with the pieces that you come back and add.  It worked like a charm and went very quickly!


I never realized this would turn into an "I Spy" quilt until I laid it on the floor and let Baby Jack climb on it.  "D'er's Buzz," he said.


Photobucket

Tuesday, January 4, 2011

Fabric Tuesday is BACK!

We're Back!
Heather and I had a great holiday.  Seriously fabulous.  A day after Christmas my family and I drove 12 hours to my parent's home in Utah...and immediately Heather and her family drove up.  We planned many a quilt, gushed over a lot of fabric, took our mother to a very questionable movie (she'll never look at us the same again), had a dance off (Heather won), ate at Cheesecake Factory mmmmm, went out with our husbands (who are also BFF), got calendars to start the year off right and we are already very improved :), gave Heather her gift (more on that later this week), planned Quilt Market, bound one quilt at the same time and snuggled with her dog Scamper.  
A holiday extravaganza.

Today I'm gonna share a couple of things I made for my oh so cute sister-in-law.  She is a 3rd grade teacher where she is extremely well loved and she is amazing at what she does.  I thought and thought of what to make her, but when I thought simply "she's a teacher" I realized one common thing.  All teacher's love their kids and their classrooms.  Easy peasy.

fabric is Robert Kaufman
dots Groovy by Caleb Gray
owls Urban Zoologie by Ann Kelle

"Here we find the owl in it's natural habitat..."  Nerd.

I'm working on a couple of friends for this little owl and it will be an upcoming pattern!

I also couldn't resist making her a banner
Doesn't it work perfectly in my kitchen??  I am going to make one for keeps to stay there, I just can't decide what it should say, any ideas?
PS See this post to learn more about my chickens!

I made the banner using photoshop but it could be made by hand, with a cricut, etc.  The circles are probably 5 inches, I hole punched the sides and ran a ribbon through all of them.  Then I went through and in-between I tied ribbons, fabric scraps and tulle.


It's time for FABRIC TUESDAY
Edition 18
Link up a recent craft project that uses fabric...if you're new don't be shy!  This is for everyone.  Click the button to add your link at the bottom and link up a recent blog post where you used fabric to create or enhance something. Below are a few "rules" to play.

Mention us in your post with either a link or make it easy and add the button to your blog sidebar and you won't have to remember each week. ***You can take either our blog or our Fabric Tuesday buttons on the sidebar.***

You don't have to do this to link up, promise. However if you want to follow us, we follow back :) But please comment telling us you did so and we will hop right on over and make sure we're following too!

And how about we each take time to comment on the link just before yours, that's easy enough right? We'd love for this to be a linky party where everyone gets comments, so if you take the time to look, take a second to leave a comment!


Fabric Tuesday 2011 style!


Photobucket

Wednesday, July 14, 2010

Hand-sewn all it's cracked up to be?

Today we're featuring a quilt from Mary at Pin. Sew. Press. (I so wish I thought of that blog name, CUTE!)  It's a darling charm pack quilt that she made for her daughter, thus it's called Lauren's Quilt.  And I just love the backing fabric she used, perfect for a 2 year old (or a 20 something year old alike :)  Here's Mary:

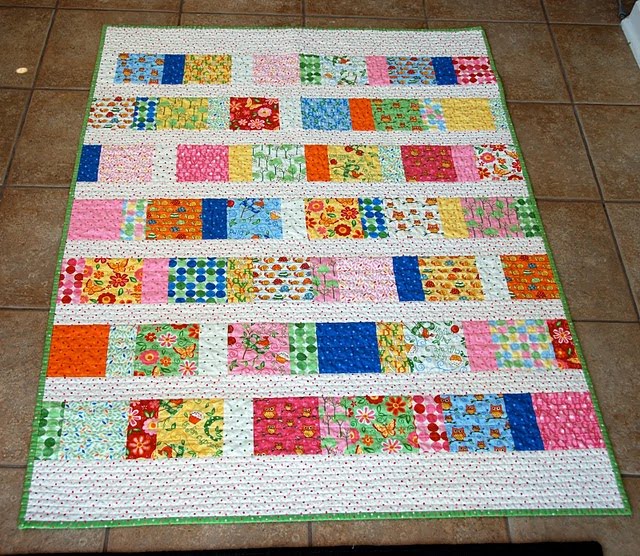
It's a bit busy for my taste, but Lauren (my 2-year-old) absolutely loves the fabric as has lots of fun pointing out the owls, snails, turtles, trees, flowers and birds.

I used straight line quilting for this, mostly because I'm not brave enough to try free-motion quilting yet! I quilted straight lines 1/2" apart on the sashing, and eyeballed straight-ish lines approximately 1" apart across the blocks.


The fabric is Love U by Deb Strain for Moda, and I think it's perfect for a fun 2-year-old quilt.

I used this tutorial by Elizabeth from Oh, Fransson! for the quilt pattern. Since the tutorial is for a baby quilt, I modified it a bit by adding 1 1/2 more charm squares to the width, and two additional rows to the length. I wanted this to be large enough for Lauren to use at night on her toddler mattress, although she hasn't really gotten the hang of sleeping under covers yet!


I just love those owls!

 
I was also feeling particularly brave yesterday and decided to hand-sew the binding to the back of this quilt. I usually machine sew my binding, and to be honest the result doesn't bother me much. I guess I'm not a "binding snob" . . . yet! But I was intrigued by the romantic notion I seem to hear about from all the other quilters - of curling up on the couch with my husband for several hours, chatting and watching tv while hand sewing binding.

I found this awesome tutorial that finally made sense of the hand sewing process for me. And after a mere five hours, I can finally say that I get it! It really does look pretty good, compared to machine sewing, but it sure did take a LONG time! And it was kind of nice to spend time with my family while sewing, and be a bit more productive while watching tv . . . but did I mention that it took a long time?!?! Well, at least I overcame my fear of hand-sewing, but I can't promise I won't go back to machine sewing binding, at least some of the time!

Well coming from a "binding snob" :)  I can say I absolutely love the finished project!  And binding is my absolute favorite part of the process...looks like a fabulous job!  Thanks for sharing, and make sure to hop on over to Pin. Sew. Press. where she has darling projects and is just a straight-up fun read for any quilter!

Linking with AmyLouWho.