Hey y'all! When Heather and Megan at Quilt Story asked me to participate in their holiday tutorial series, I was thrilled. I'm excited to share a tutorial for a table runner using my purse strings quilt blocks.
If you're anything like me, you're in mad Christmas gift-making mode right about now. It's only a little over six weeks away, you know...scary! Anyway, if you're in need of a quick gift, or a fast way to dress up a table for a holiday dinner party, keep reading!
The table runner will be made with four blocks, and will measure 15 inches wide by 60 inches in length. So, it's nice and long!
For each block, you'll need three contrasting fabrics, plus a solid:
*center fabric- one 5.5 inch square- this would be a great place for a fussy cut!
*purse flaps (blocks that surround the center)- four 5.5 inch squares
*purse strings (corner blocks)- four 4.5 inch squares
*16 solid squares- 3.5 inches
To make the purse flaps that surround the center square, take one 5.5 inch square and line up a solid square. You'll be sewing corner to corner. To keep your stitch line straight, many people recommend drawing a diagonal line across the back of your square as a guide. I really hate this step, so as a little trick, I use a piece of painter's tape aligned with my needle on my machine and table.
By the way, if you have a fabric with a radiating pattern, this is a great place to use it. Just be sure to sew your solid squares to the top. Sew corner to corner and trim off the excess like this-
Give it a press, and sew another square to the adjoining side.
Trim the other side as well, and give it a quick press. You'll need four of these for each block. Don't worry about the fact that your point does not go all the way to the edge of the block like a flying geese block. That's by design. When the blocks are put together, this will create some awesome negative space!
To make the purse strings that are on the corners of the blocks, just use the same corner to corner sewing method, but instead of sewing to two adjoining sides, sew the solids to the opposite corners. This block is commonly called the Road to Tennessee block.
Then just trim and press!
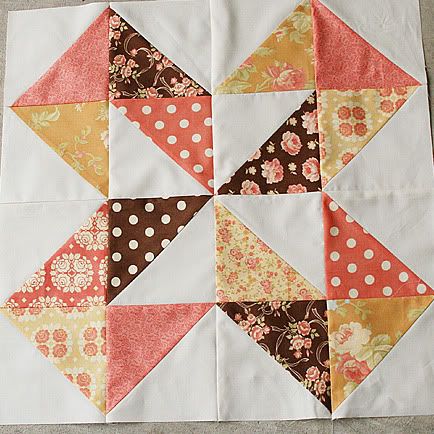
After you've made four of these, it's time to put the block together! Just sew the units together just like a nine patch!
This is a 15 inch block, and I've sewn four of them end to end for my 60 inch table runner. If you would rather a shorter one, just make three blocks instead! (by the way, table runners are hard to photograph with their long, skinny shape)
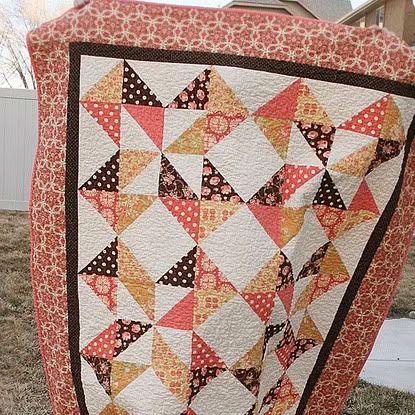
You could also make a 30 inch table topper with your four blocks by putting them together like this. See what I mean about that negative space? I love the "kissing squares" shape created when the blocks are put together!
Then just baste, quilt and bind using your favorite method! To see a whole quilt made with this block, check out Grapefruit Fizz!
Feel free to play around with the block size and make it your own. If you would rather make your blocks smaller than 15 inches, here's a little chart to help you modify the block size-
I hope you've enjoyed the tutorial, and wish you a wonderful holiday season! Be sure to check out Quilt Story in the next couple of weeks for the rest of the Holiday Tutorial Series lineup!
Thursday 11/14 Lindsey from Inspiring Creations
Wednesday 11/20 Jennie & Clara from Clover and Violet
Friday 11/22 Teje from Nero's Post and Patch
Monday 12/2 Tessa from The Sewing Chick
Wednesday 12/4 Bev from Flamingo Toes
Monday 12/9 Stacy from Freshly Handmade
Wednesday 12/11 Christa from Christa Quilts
Friday 12/13 Erin from Why Not Sew?























11 comments:
Great tutorial, Kelly! I just love your purse strings block! Thanks for sharing!
Very nice runner Kelly
That looks beautiful. I like how the solid blocks appear to float in the design.
Thank you Kelly for a great tutorial! I like this block and will make something for the Christmas - it reminds opened Christmas present! x Teje
very nice tutorial...thank you!
great tutorial thanks for sharing! I have pined this to try out!
I love the way the Christmas fabric looks on this block! Great block Kelly!
Such fun blocks! I love them in Christmas colors!
Very cute. I appreciate the chart with the smaller sized blocks. Thanks.
Watch and Download world's famous Turkish action drama Kurulus Osman Season 3 in English on link below
👇
Kurulus Osman Season 3
Kurulus Osman Season 3 Episode 1
On link below
Kurulus Osman Season 3 Episode 1
Crypto trading course
Join on link below
Crypto quantum leap
YouTube course
Be a professional YouTuber and start your carrier
Tube Mastery and Monetization by matt
Best product for tooth pain ,
Cavity ,
Tooth decay ,
And other oral issues
Need of every home
With discount
And digistore money back guarantee
Steel Bite Pro
ดูหนังออนไลน์ It's so good, I like it, I'll share it.
Post a Comment