Photobucket Photobucket Photobucket Photobucket Photobucket Photobucket Photobucket Photobucket Photobucket Photobucket Photobucket Photobucket Photobucket

Showing posts with label embroidery. Show all posts

Wednesday, November 20, 2013

Holiday Tutorial: Clover and Violet

An awesome Holiday Tutorial from Clover & Violet!  Jennie and Clara are a mother/daughter team who are uber talented!  They are the ladies to see when combining embroidery and quilting.  They have a lot of helpful tutorials and QAL's.  I'm sorry I've introduced you, once you click over your morning will be gone :)  Check out all the other Holiday Tutorials and we have more coming!  Thanks ladies for sharing!!  Here's Clara:

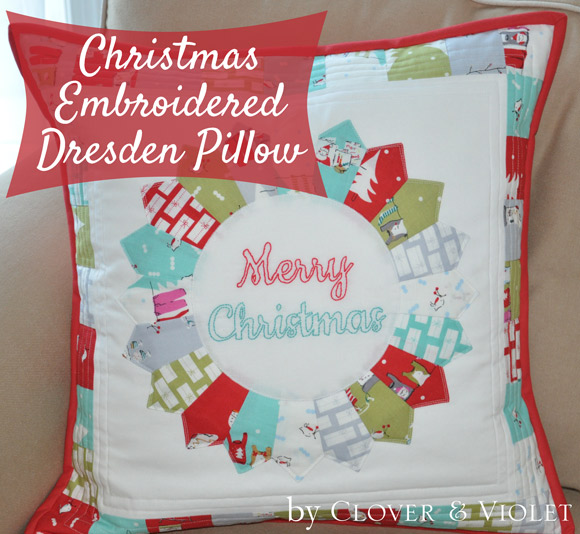
Christmas-Embroidered-Dresden-Pillow

Hi, this is Clara from Clover & Violet! I am happy to share my newest pillow that I think is going to give my home some Christmas cheer this year. I have had a little bundle of Cherry Christmas designed by Aneela Hoey in my stash since last year and I think I have found the perfect use for it. I love the colors and really like the embroidery too!

So let's get started and with Quilted Dresden Pillow with an Embroidered center for your home or for a gift.

Note: Read all directions before beginning, all seam allowances are 1/4" unless otherwise noted:

Supplies:

  • Download the template and embroidery pattern here
  • 20 - 2 1/2" x 4" rectangles for blades
  • 32 - 2 1/2" x 2 1/2" squares for scrappy border
  • 14 1/2" x 14 1/2" square white background fabric
  • 9" x 9" white square for the embroidered center
  • 9" x 9" fusible interfacing
  • #8 Perle Cotton (I used Finca #4059 - aqua, and Finca #1166 - red)
  • 2 - 2 1/2" x wof strips for binding
  • 2/3 yard for pillow back
  • 18" pillow form

Let's Get Started:

Dresden-Blades1

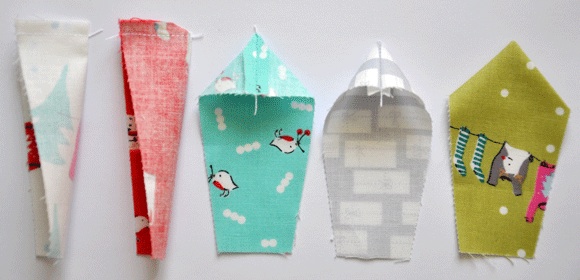
Using the template, cut 2o blades. Fold the top points together, right sides together, and then sew them together as shown. Chain sewing is easiest and quickest.
Blades-Step2

Trim the corner at the fold, press seam open, turn and give each blade a final pressing.
Dresden-Blades3

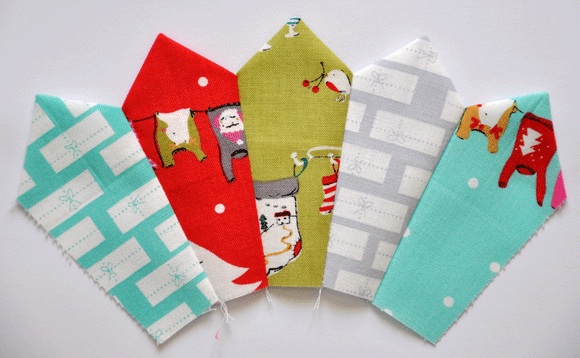
Turn the blades right sides together and sew 1 /4" seam allowance along the long sides. Sewing them together in sections makes it easier.
Dresden-Blades4

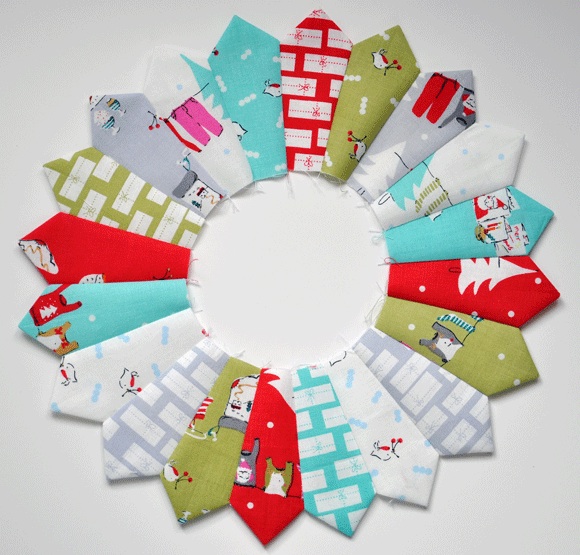
After all the blades are sewn together, press the seam allowances in one direction.
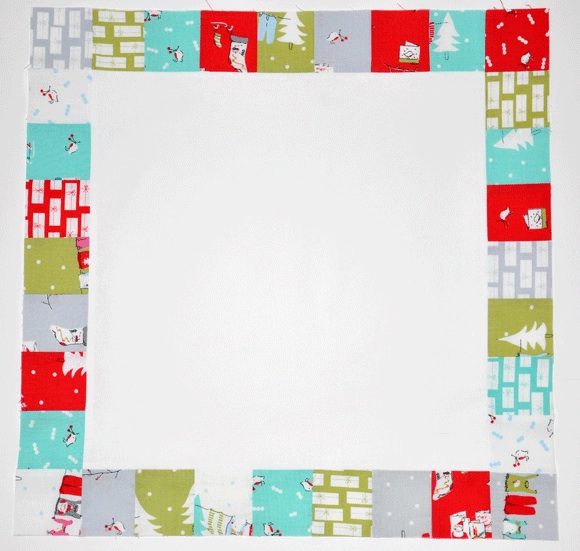
Scrappy-Border1

Sew 7 squares together for both sides and sew onto white block. Now sew 9 squares together to sew onto the top and the bottom.
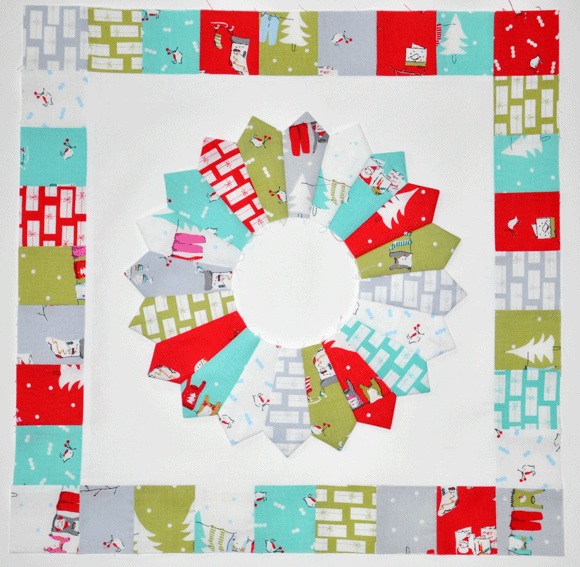
Border-wDresden

Center the dresden onto the top with the borders. Pin and stitch in place, going around each blade.
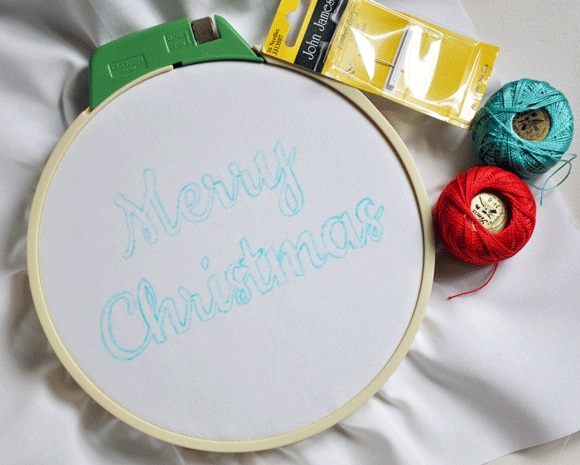
Embroidery

Prepare your fabric for embroidery by fusing interfacing to the back of the 9" fabric piece and tracing the design onto the center piece with a water soluble pen (or any method you prefer). Just be sure that if you use a water soluble pen you spray with water before pressing or you will set the pen in the fabric and may not be able to remove it. I used red and aqua floss but you could use any color that you like that goes best with your fabric choice.
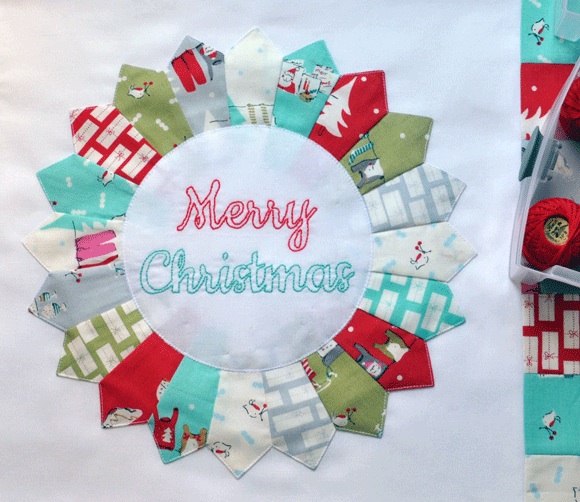
Stitched-Embroidery-in-Center

When you have stitched the design, trim the center circle to the size of the template. Center it in the dresden and stitch in place, I used a blanket stitch on my machine. But you could turn and appliqué or hand sew if you like.
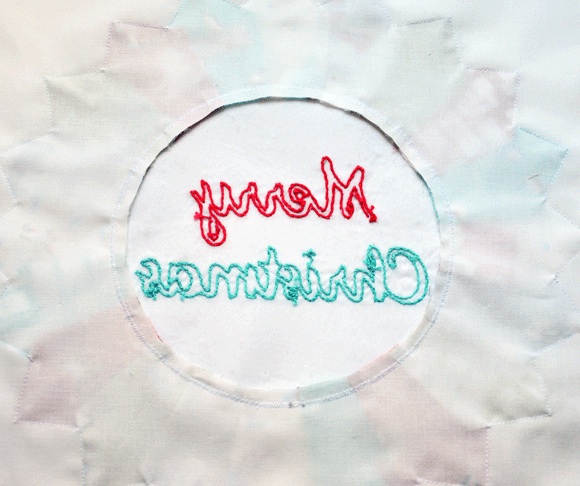
Trim-Back-of-Center

After you have stitched your center onto your pillow front turn it over and cut through the backing fabric to remove the excess fabric from your dresden, it will show through to the front if you used white and there are any darker colors in your blades. I like the way it turns out best by doing this.

Pillow-Front-Quilted

Now layer the top and batting, (a little larger than your 18 1/2" x 18 1/2" top) with a white or light fabric under the batting just like a quilt sandwich for a quilt. Quilt as desired and then trim the batting to the size of your finished pillow top.
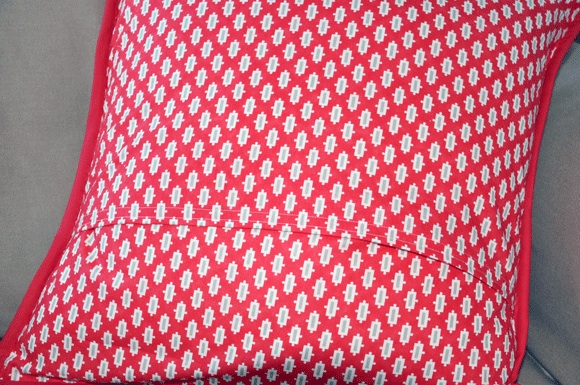
Pillow-Back

Make the pillow back by cutting two pieces of fabric, 1 half will be 18 1/2" x 15 1/4", the second half will be 18 1/2" x 10 1/4". Turn under 1" on both top and bottom pieces to hem. Lay the back pieces on the back of the pillow front overlapping the larger piece on top and pin in place. Sew around all four sides using a 1/4" seam allowance. This will create an envelope for your pillow.
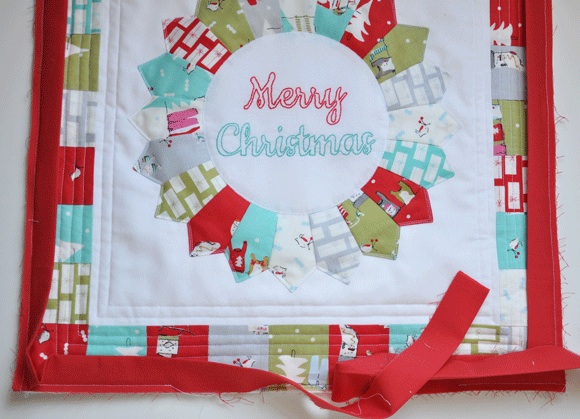
Binding-

Add binding to the front in the same way you would for a quilt. Turn and hand stitch in place on the back.
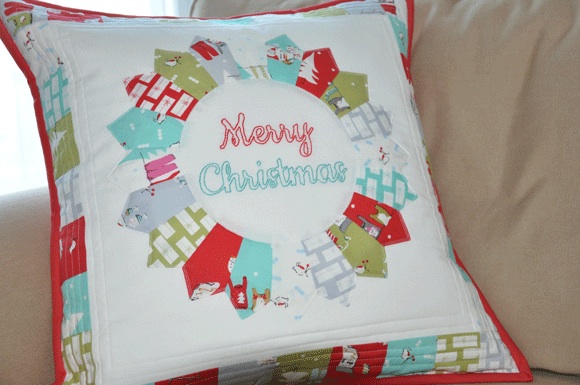
Dresden-Pillow3

Put your pillow form in your pillow case and enjoy.
Photobucket

Friday, July 19, 2013

Embroidery tutorial and ideas...


Today I did a guest post for Clover in Violet series, A Season by Hand. Welcome to Clover and Violet readers, we hope you like what you see.

 I decided to share an embroidery project that is twist on the norm. 


I embroidered right on top of a fabric I already loved. This is Sarah Jane's Out to Sea fabric line, and this mermaid is darling!

To start, cut the fabric piece about an inch and a half larger than the hoop you are using. 

Another tip is to add a circle of fusible white fleece to the back, this helps your stitches not show through to the front of your project. 


I started with a simple filler stitch for the mermaid tail...


I added some stem stitching to her hair, just pieces of her hair, not all. Then I did a handful of frenchknots to the starfish. The texture really stands out. You could be done here if you liked it. 


I decided to go on and "freestyle" the fishes. The same style of fish were in a different area of the print, so I basically just copied that idea and added the fish next to her. I really like them. 


When you are finished, pull tight, and use a glue gun and glue the fabric edges to the back of the hoop.


You are finished! A sweet, semi-custom, darling embroidery hoop art.

Hope you enjoyed the tutorial, and if you are new from Clover and Violet, we hope you come back more!

Photobucket

Monday, May 6, 2013

Garden Steps Quilt from Clover and Violet


The gorgeousness of this quilt is almost too much, it makes me so happy!!  So girly and pretty.  And when you read/look closer you'll see it is also embroidered.  It's from the Garden Steps Stitch & Quilt Along at Clover & Violet.  So darling right??  Jennie and Clara (mother-daughter duo) have some amazing projects they are always sharing and teaching like this darling Lone Quilt Block Pillow tutorial.  For all things inspiring like quilting, stitching and sewing you must add Clover & Violet to your list :)

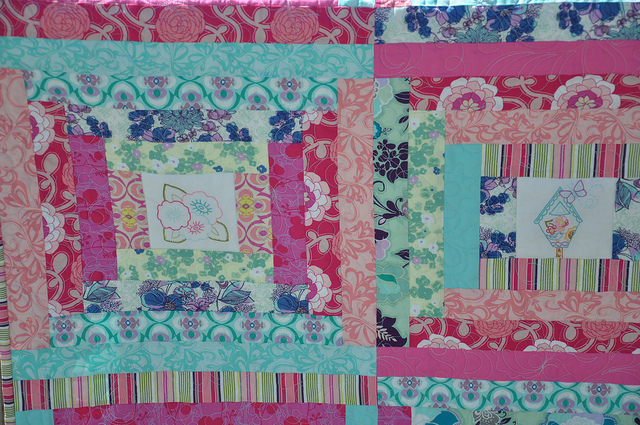
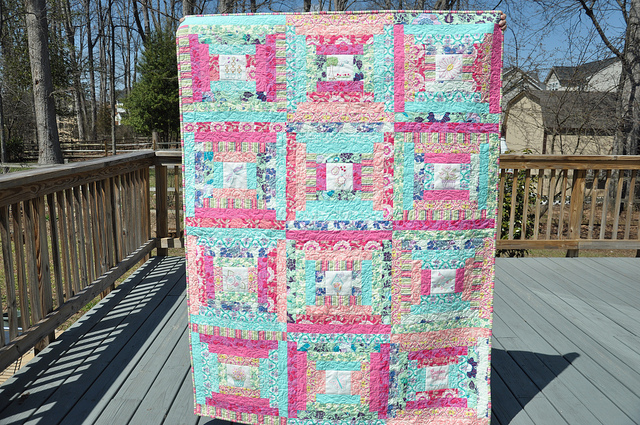
My Garden Steps Stitch & Quilt Along!8613558015_35b6e2c2ea_zWe are having nice weather here which made a good day for taking photos outdoors. I am glad to have another quilt finished, even quilted and bound. I had help finishing this quilt. Kathy from Stitch by Stitch, quilted it for me and I love the way it turned out!! Thank you Kathy, she is great to work with and does such nice quilting!!
8613559357_8b6c485ff4_z
She used a very light aqua thread to quilt it, it is a little out of my comfort zone but I took some advice and I think it works well because of all the aqua in the front and the back.
8614666870_8a18bda1ba_z
I am very happy that I used this blue Domestic Bliss for the backing!! Isn’t the back pretty with the floral quilting in an all over pattern!
8613558565_e1772f25ca_z
8613559975_60999c9944_z
Hope you are having a great day!

Photobucket

Monday, December 17, 2012

Studiolo Insect embroidery quilt...


Casey from Studioloblog submitted this awesomely embroidered quilt. We love it! That is a ton of embroidery with a great technique! Casey blogs here, she loves art history, quilting and design, she plans to start her own pattern company early next year! I think this quilt is very unique and fun !  
I have been itching to show this quilt top since I started it…er…last summer.
 This weekend I finally put in the final stitches, and I have to admit that I’m quite pleased.  More importantly, my son Julian is pleased, since this quilt is for him.  Which is why the appliques are of dandelions and bees. Luckily, his little brother Simon asked for nice, streamlined sharks for his quilt!
Because of the intricacy of the silhouettes (antennae, anyone?) the shapes had to be done in raw edge applique.  I don’t really want them to fray over time, though, so I had to be inventive in how I applied them.  I’m terrible at machine applique, and I don’t really like the way it looks on my machine at home, so I ended up doing the whole thing by hand.  I fused the shapes to the background and then blanket stitched around them with clear thread.  To protect the edges, I then chain stitched around them with embroidery thread.
I’m not sure if this will work to protect the edges a bit and prevent them from fraying, but the embroidery will at least ensure that the outlines of the silhouettes remain crisp.
I haven’t come across this technique in my research on-line, and I’m thinking it will turn out to have been either brilliant or really, really stupid.  Once I’ve washed the quilt a few times, I’ll let you know how it turned out.  I can at least say that the process of hand-stitching was enjoyable, if slow.  I hope I don’t have to applique any more insects for a while, though.


Photobucket

Friday, September 21, 2012

Cancer is so limited by Robot Mom Sews


This sweet quilt comes from Robot Mom Sews. Made for a friend's Dad diagnosed with cancer. What a kind gift to give. Cancer has hit so many of us so close to home. Megan and I recently had an Uncle diagnosed with a very aggressive cancer. Heartbreaking! I am sure this quilt will bring this man peace. Be sure to check out Robot Mom Sews, and visit her etsy shop too!

My best friend's Dad was recently diagnosed with cancer and I knew right away that I wanted to make him a quilt.  I talked to her about it and she mentioned she saw this wonderful saying at the hospital about how cancer is so limited, it cannot destroy families, it can't take away love, our dreams etc.  She wanted to cross-stitch it and we decided what a great idea to incorporate it into his quilt.  She copied the saying and cross-stitched it and I got started on the quilt.

I wanted this quilt to be so perfect, I gave myself stress over it.  I kept running into problems, my machine was not cooperating, I ran out of thread, then I bought the wrong color thread!  It was one thing after the other and I kept thinking, I've never had this many issues on any other quilts.
I wanted it to be comforting to their family and this quilt means so much more than my other quilts. 
It's not perfect.  There are mistakes everywhere.  But this quilt needed to get to him and I just hope that this quilt can bring comfort to him and their family, regardless of it's imperfections.
We've all known someone or a loved one that has been stricken with cancer.  I love this saying and I'm glad my BF found it - it can remind us all that cancer is so invasive and can take away so much, but it can't take away everything from us.


Photobucket

Friday, July 6, 2012

Boy Quilt from Lilabelle Lane Creations


Sharon from Lilabelle Lane Creations is a mum, quilter and embroiderer among many more things I'm sure!  And it shows in this quilt with the combination of piecing and embroidery.  Such a sweet quilt for a little boy!  Make sure to stop by Lilabelle Lane Creations, see her 2011 finishes, 2012 finishes and Mini Quilts for a treat!  Thanks Sharon for sharing your quilt!

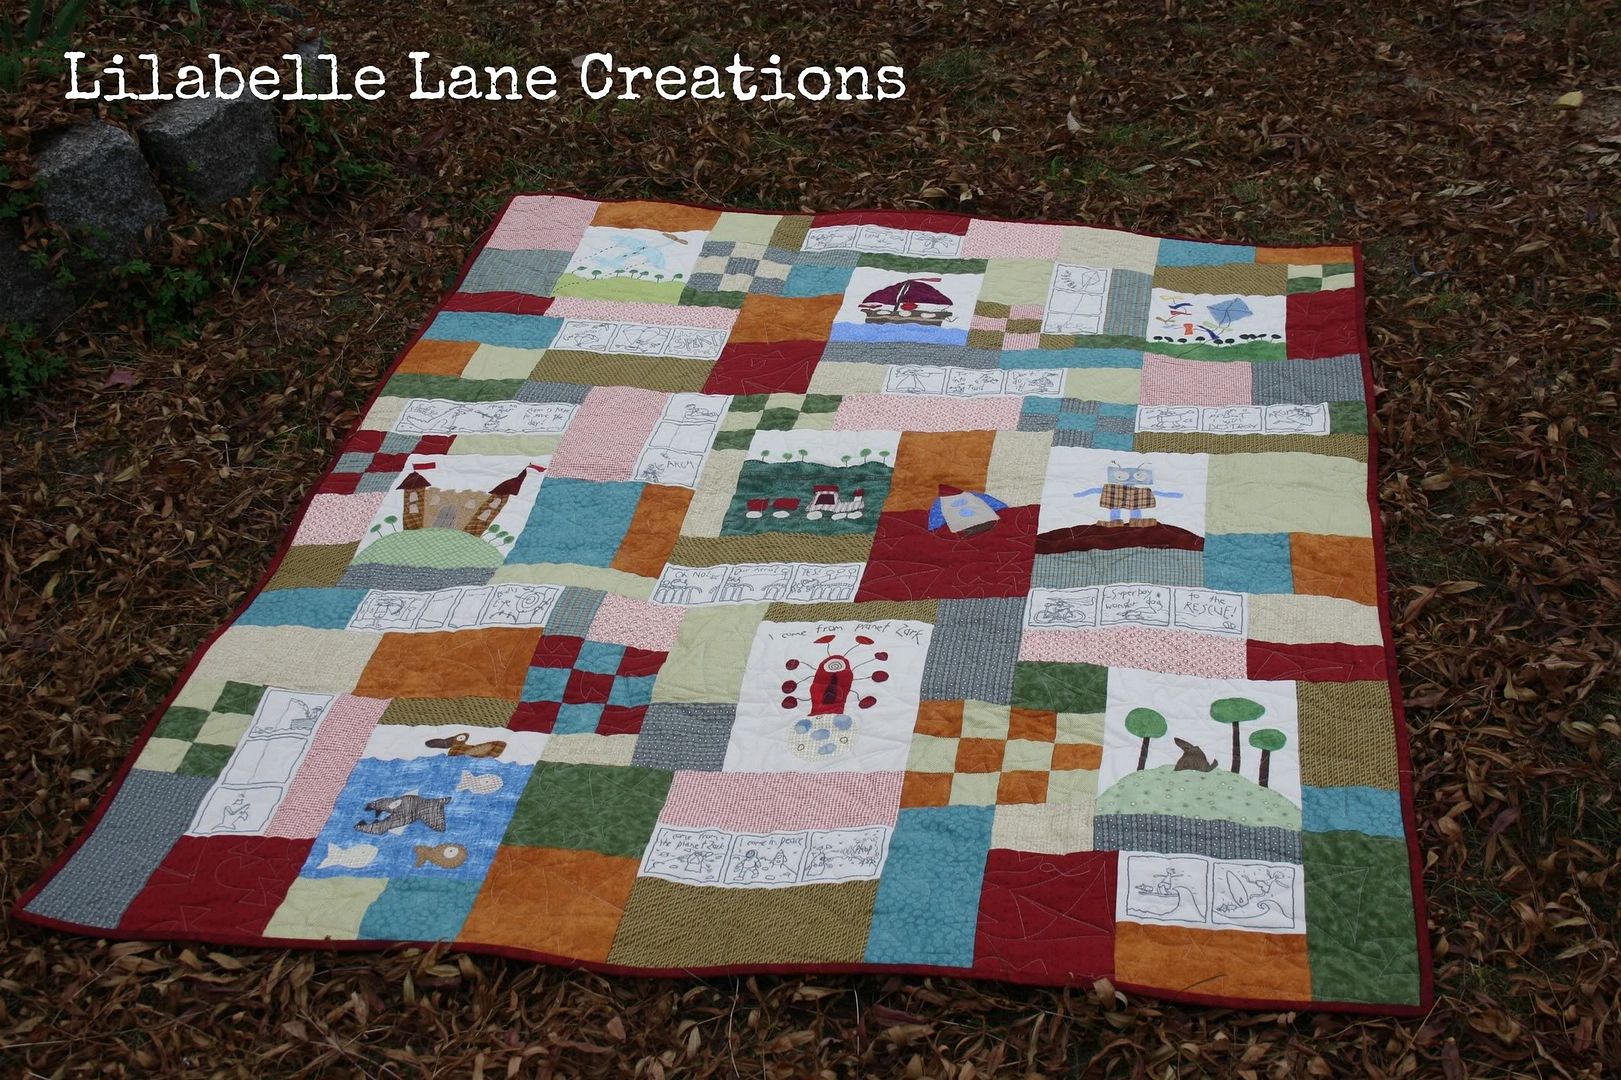
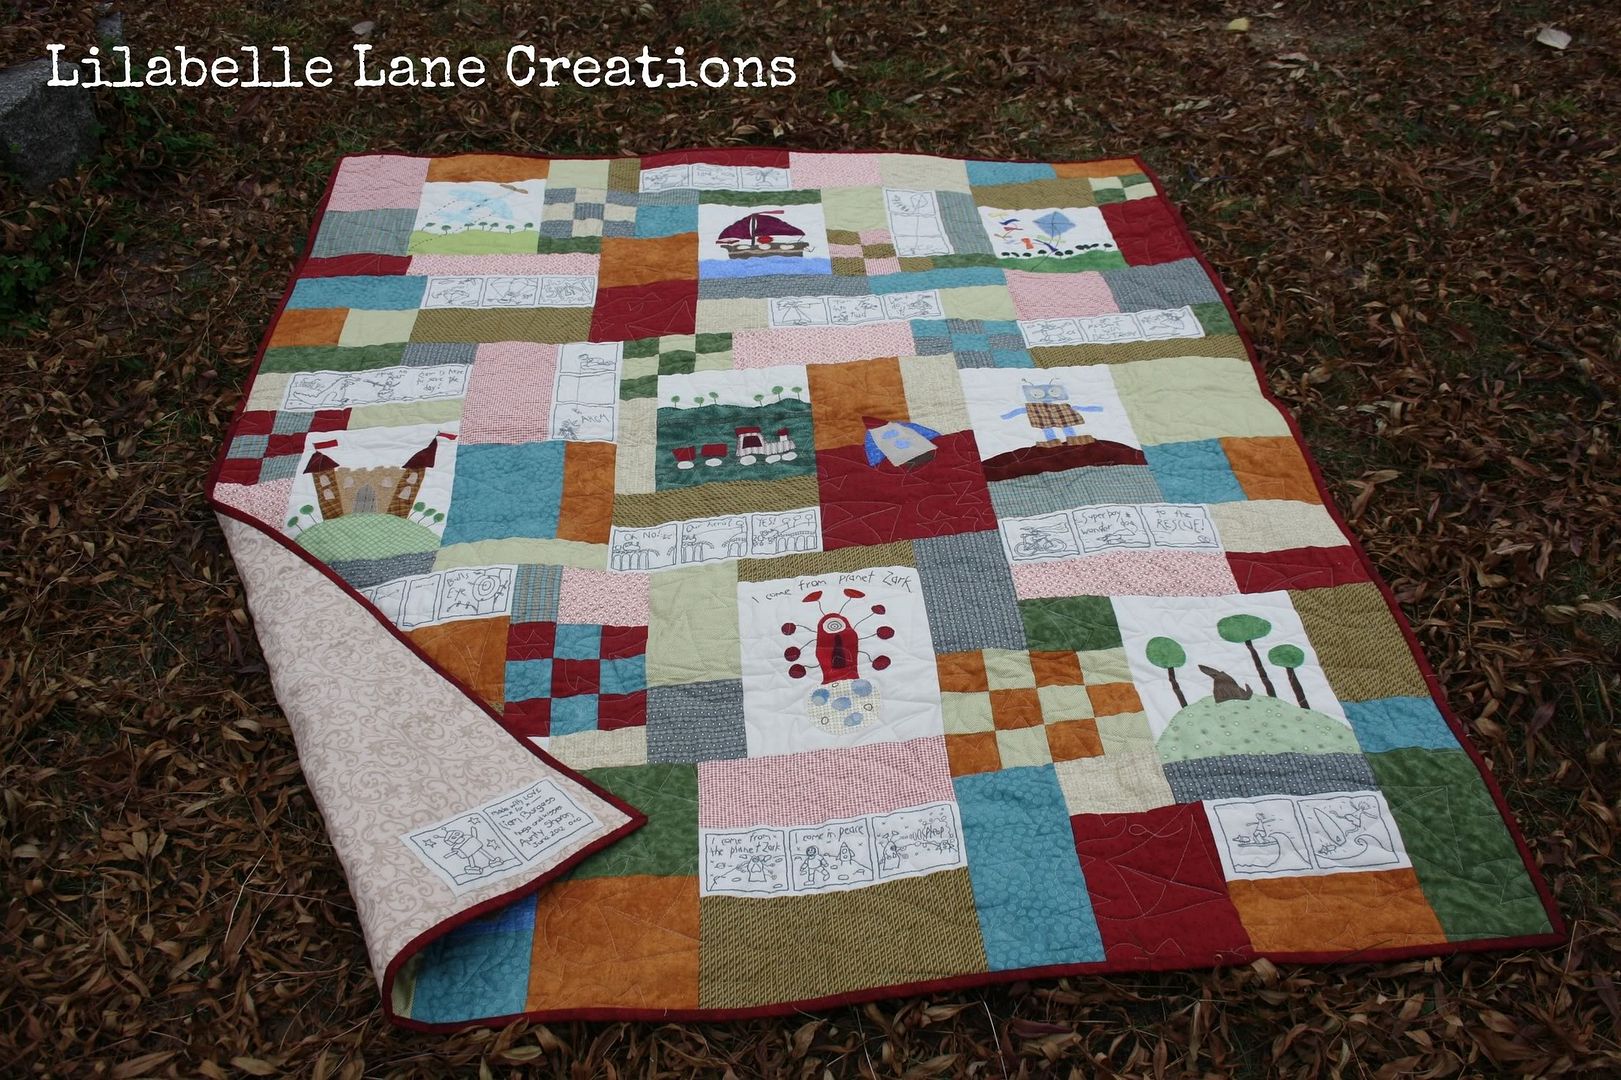
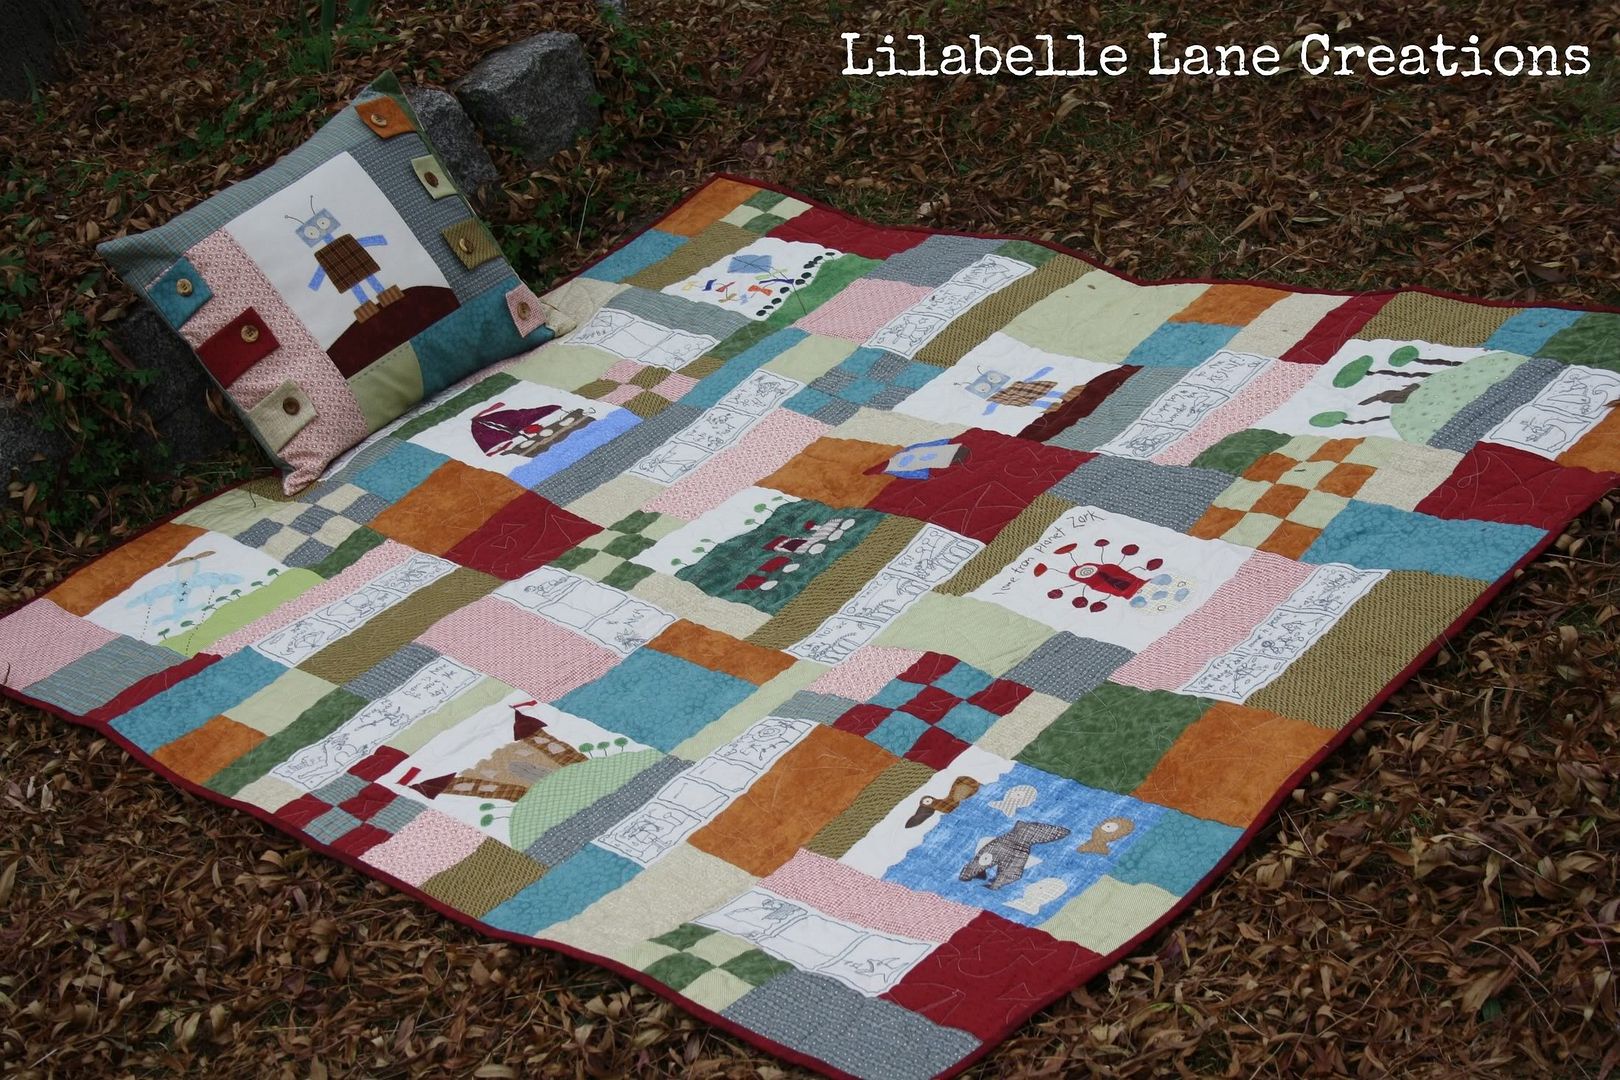
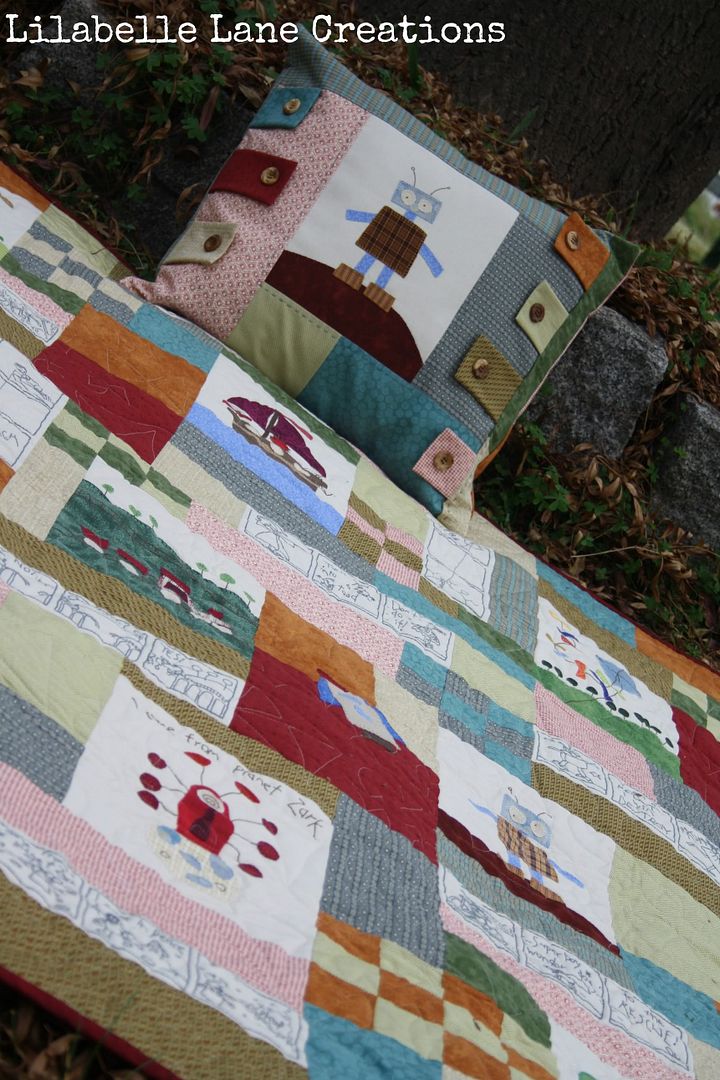
A Boy Story Quilt

This quilt just makes my heart go all warm and fuzzy.
It was a Quilt that I was always going to make ... one day.
Well that day came when I thought my second son was going to need
surgery at Easter and if I was going to be at the hospital then I needed
something to work on.

We left the specialist and went straight to the fabric shop, supplies bought.
Home and then some stitchery's were traced.
I was ready and the journey of this quilt began and the self imposed
deadline was set.  My gorgeous Nephews 3rd birthday - 7th June.

I did it!


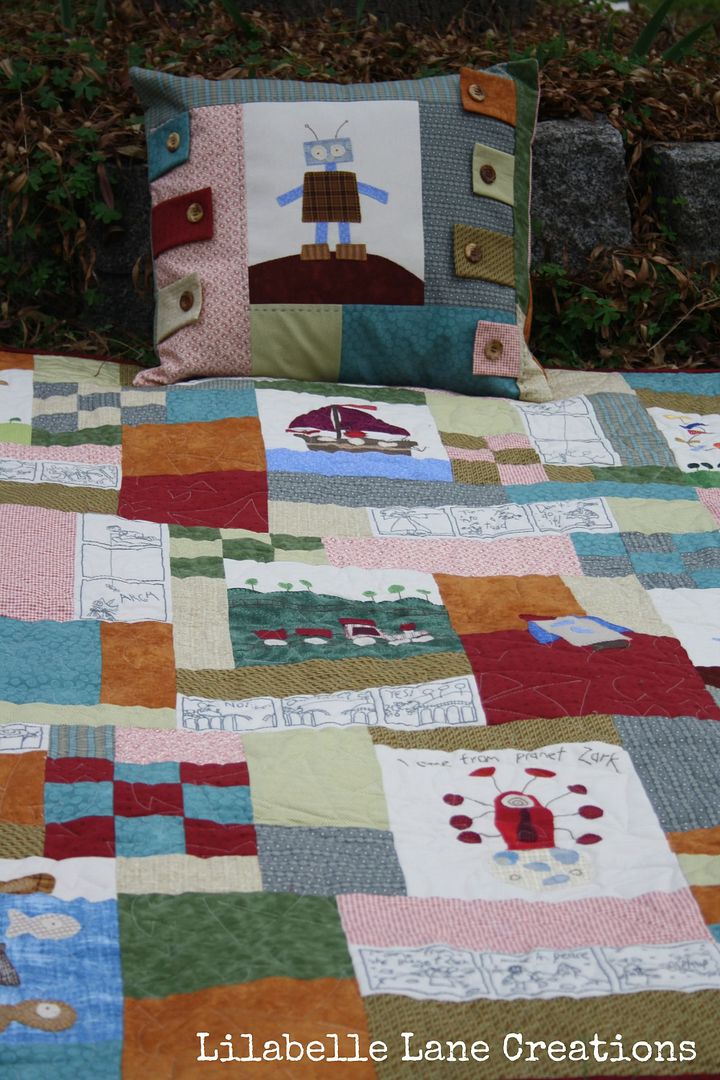
 and the matching Pillow


I even put a quilt label on it so it is a real finish!


It has been quilted with an all over Kite Pantograph by Linda at Ladybug Quilting.
Thank you Linda.


- Quilt Stats - 
Pattern 
"A Boys Story" by Annie Downs of
Hatched and Patched
Finished Size
54" x 68" (138cm x 170cm)


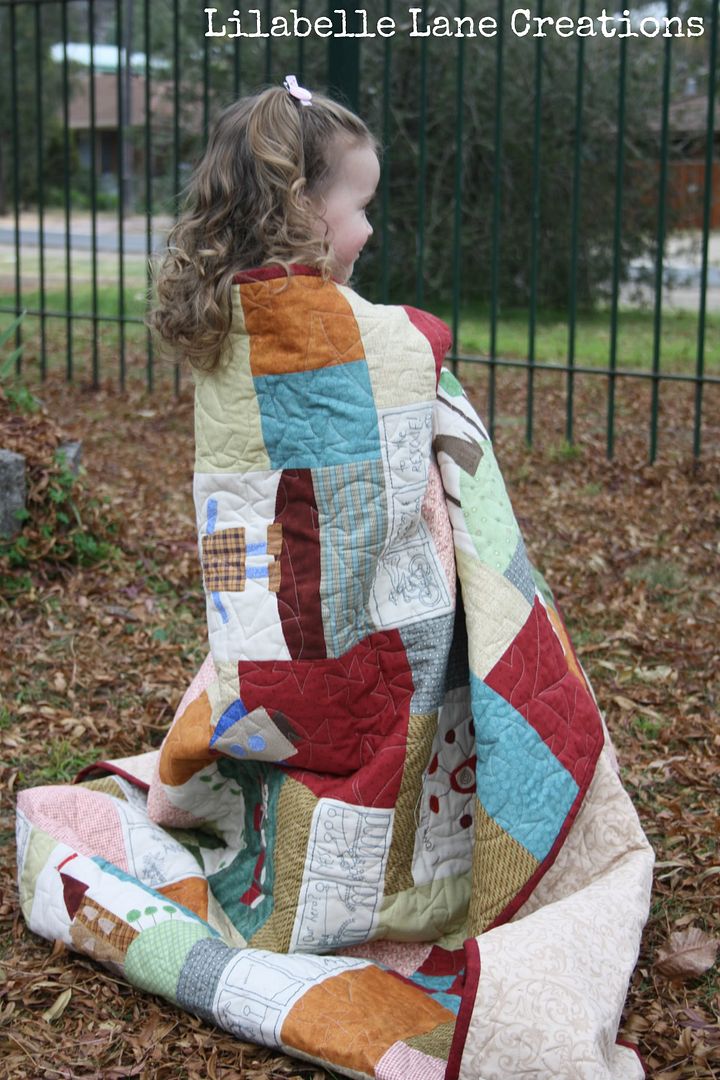
Every stitch of this quilt was placed with love for Liam
and Lily has finished it off by filling it with cuddles.


So and Update on Declyn. 
He never had surgery. 
A lot of time had been spent at specialist and physio appointments (still one more Specialist Appt) so the stitchery's were still well timed!  He is allowed to return to sporting activities on the 1st June. He has done no running or anything for over 11 weeks and has just been given the all clear to ride his bike, he still has to get his fitness back up .....

"Really Declyn, do you have to play football this year?"

Arghh ...  boys will be boys
 and on that subject, remember Aiden's little adventure into the 
"knee injury playing field" as well?  
Yes he dislocated is patella (knee cap) and has a small tear in his ACL.

Now boys, you know I love you both but no more Knee injuries OK
 and I know you joke about it now, but really, both of you at the same time?

I'm off now. 
Have to go buy some wrapping paper and a card and get this Quilt ready to mail.
Thank you for sharing the journey of this quilt with me.

Now what ..... something new?

Photobucket

Photobucket

Tuesday, January 24, 2012

Wonderful memory quilt from Nancy Noodle...

Nancy from Nancy Noodle made this wonderful quilt in memory of her Uncle. The details that went into all the embroideries is amazing! What a great gift to give to the family who lost their father and husband.  Be sure to visit her blog, and she has a cute etsy shop as well...

Quilt of Shaun
My final post of 2011 is dedicated to a quilt that has taken me most of the year to complete. I first envisioned a quilt dedicated to my uncle Shaun a little over a year ago. In October 2010 he passed away suddenly, leaving my aunt and her 3 kids heartbroken.
I enlisted the help of my sister Amber and my mom in the project. Amber, who is great with design and drawing helped me figure out which aspects of Shaun's life we should include and how to do so. She drew most of the images that became the stitcheries. We divided the 10 blocks between the 3 of us. A few months later I collected the stitchery blocks. We collaborated on fabrics/quilt designs, and from our collaborations I created this quilt. Just in time for Christmas too!
I love how it turned out. The colors, the design, the fabrics, the stitcheries, the straight line diagonal quilting, even the back.
Fabrics used in this quilt: Kona Cottons (Lemon, Banana, Medium Grey & Ash); Michael Miller's Dumb Dot, Peacock Lane- Meadow and Going Coastal- Sea Kelp; Free Spirit's Soliel and Silent Cinema- Iris Yellow; Ary Gallery's Modern Affair; and Cloud9's Cut Out & Keep- Poplin Avenues.

Now for a brief look into Shaun's life:
Family was always the most important part of Shaun's life. His wife, his children and his extended family.
Shaun married my Aunt Karen in the Idaho Falls LDS Temple.
He served a religious mission to Japan.
He was a farmer, and operated a red combine. He was one of the hardest working men I've ever known.
Shaun attended and graduated from Brigham Young University.
He taught his kids to ski when they were small and it was always a favorite family activity.
He loved scouting and was involved in it his whole life.
Shaun enjoyed read, and I always remember that there was stack of books on the table beside his chair.
He was raised in and lived his life in a small town in Idaho.
He went to Oakley High School and enjoyed sports.

My uncle Shaun was a great man, a man whom I want to try to emulate in my own life. Creating this quilt about him has helped me to remember that and I hope that it will have that same affect on others, especially his children and future grandchildren who won't have met him but can still benefit from his example and love.