Photobucket Photobucket Photobucket Photobucket Photobucket Photobucket Photobucket Photobucket Photobucket Photobucket Photobucket Photobucket Photobucket

Showing posts with label hst quilt. Show all posts

Wednesday, May 21, 2014

My Bright Colorful Rainbow Polka-dot HST mini quilt...

Heather here. 
If you have been following me on Instagram (@quiltstory. Megan is @quiltstorymeg.) you have seen this all before. My bright colorful rainbow polkadot HST mini quilt. (that's it's official name)


Started with a bunch of 3.5" HST's


Found the block on Pinterest. Pretty easy layout. Did some straight line quilting. (super easy since it was a mini)


Even went with some colorful polkadot backing and binding, over the top, I know. 


Ta- Da! I just love the pop of metallics. They are Michael Miller mirror ball dots. Love. 


And I even have it up on the wall with a few other watercolors, embroideries and another mini. It makes me happy. Hope you like it!


Photobucket

Monday, March 25, 2013

Pezzy Churn Dash Quilt from Random Thoughts...


The multi talented Diane from Random thoughts...do or "di" made this "Pezzy Chrun Dash" quilt. How cute is this picnic quilt? I love the random solid blocks in the quilt. I am always to scared to do something like this, but I love seeing it, maybe I will try. Diane loves quilting, gardening, traveling, photography, cooking etc. My kind of gal. Be sure to check out her blog...


I have finished the Pezzy Churn Dash Quilt.
My fourth finish for the year!


I already admitted that I blatantly copied a few other talented ladies here.


This quilt was made with a Layer Cake of Pezzy Prints and White Kona Cotton.
I also added a few coordinating solids
to add to the fun of this quilt.
To say it was easy is an understatement.
To me, this quilt really packs a huge punch for the amount of work that went into it.


Using a walking foot,
I quilted it with straight lines on both sides 
of each vertical and horizontal seam
of each square.


I have a baby shower to go to this weekend.
They already have a little girl and don't know if they are having 
a boy or a girl this time.
Every family needs a picnic quilt.
So that's what they are getting from me.
Any excuse to give someone I love one of my quilts
gives me great pleasure.


Backed with grey gingham and bound with orange polka dots.
This quilt just makes me happy.

I really enjoyed making this quilt.
I have a Layer Cake of Mama Said Sew.
Maybe there is another Churn Dash Quilt in my future.


Quilt Stats
Name: Happy Picnic Quilt
Fabric: Layer Cake of Pezzy Prints and White Kona Cotton, with a few coordinating solids.
Backing: Grey Gingham by Riley Blake
Binding: Orange Polka Dot by Riley Blake
Quilted by: Me, with straight lines using a walking foot
Thread: Pieced with Aurifil 50 wt. white, Quilted with Auriful 40 wt. White 


Photobucket

Monday, June 18, 2012

Charm Pack Quilt from Katie Mae Quilts


Last week was busy for Heather and I.  Heather was on vacation with her family and I was hosting our mom, dad, a niece and nephew!  Phew!  Sorry for not getting the winner of the Skye Reve Fabrics $25 giveaway as promised.  Drumroll....


Kirsten N said...
I like the Secret Garden bundles - the blues are so lovely.
Congrats Kirsten!!  It's always fun to see familiar readers win. Send us an email and we'll get you your prize!!  Now for the feature...

Sweet and simple quilt today from Kate of Katie Mae Quilts, a quilt that she made from a QAL.  I love the colors, so sweet, perfect for a girly :)  Kate is a mom, wife to a military man and has two cats, as she describes one annoying and one fat! :)  She's got a great list of her finishes and soon to be finishes...see her Tops Waiting to be Quilted, Finishes 2008-10, Finishes 2011 and Finishes 2012 for some great eye candy!

I don't have a song title name for it yet, but I'm taking suggestions.
It was started over the summer (with the actual quilt along) but obviously wasn't a priority until I made it one.
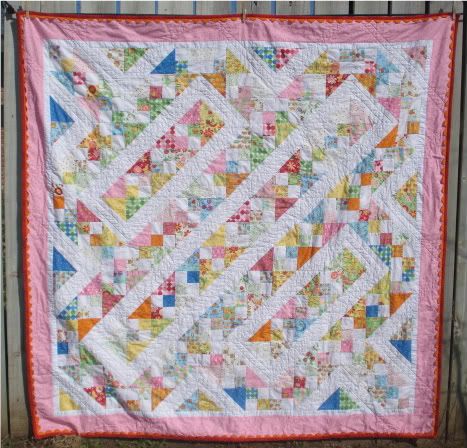
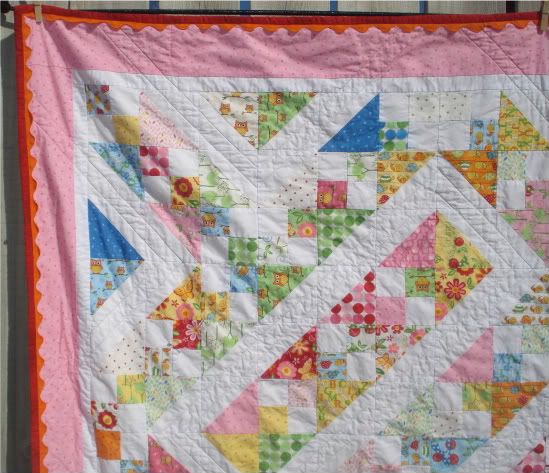
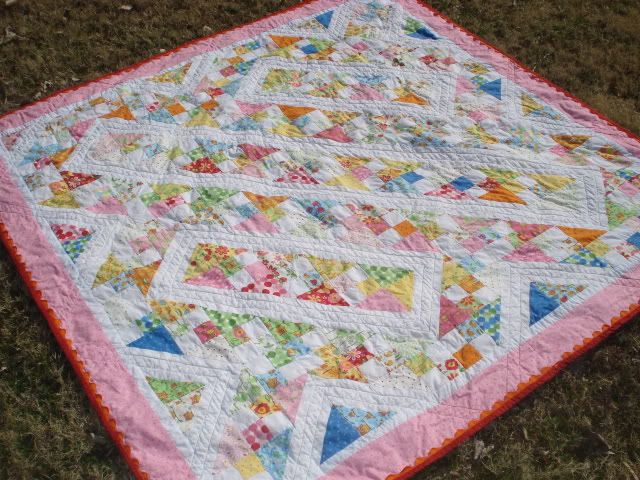
I wanted to avoid the bulky seams, so I quilted straight lines in the white. It's bound with rick rack (so fast and easy!)
 It's 70x70", made with Deb Strain's Love U and white Kona.
The wind didn't think I should take a flat picture of the back. It's lemon Kona and that random yard of Love U.
And now it's off to my niece, who instantly declared anything pink and butterflies as hers.


Photobucket

Monday, May 21, 2012

HST Doll Quilt from Plum and June


Happy Monday! :)  Sometimes the simplest quilts are the most interesting!  I love this doll quilt by Beth from Plum and June.  And it's her first go at HST...I would not have guessed! Stop by Plum and June, I was just going through her last few posts and saw some really sweet baby quilts!  I love this quilt she entered into the blogger's quilt festival and this simple patchwork quilt...cute stuff.  Thanks again Beth! 

I finally tried making Half Square Triangles and now I know what all the fuss is about!  They really are fun and easy to put together.  Whoever came up with the right sides together, draw a line down the middle, sew two lines, and cut was genuis! 

I used this charm pack from the "big order" from months ago that I had regrettably prewashed.


Made one and squared it:


Made many more and squared them:


Then I just started arranging and rearranging and mixed in some of the now completely gone solid yardage that I had in my stash (actually, I had to cut some off one of my WIPs - Yikes!) 

And, the Sun and Water Blocks doll quilt was born (have I mentioned that my kids name the quilts???)

I'm again not sure this is exactly my aesthetic but I guess my aesthetic is growing.  And I really enjoyed the HST method so I think when my new fabric order comes, I'll make another one. 

This was another doll-sized, stroller-size quilt.  I like making this size because it can be done in a few nap times, allows me to experiment with new techniques, and it is actually the most practical size for me right now - great for the stroller and floor for the baby AND great for my older girls for their dolls and for gifts for other little girls who love getting things for their dolls.


Photobucket

Wednesday, February 1, 2012

Svetlana of s.o.t.a.k. handmade's HST Quilt

Happy Wednesday everyone!  Today we've got a feature from Svetlana of s.o.t.a.k. handmade and I love it!  Two of my favorites, half-square triangles and the colors blue and green!  Svetlana has a really unique and original style, check out her quilt finishes and her tutorials...love this lunch tote.  Make sure to see her at s.o.t.a.k. handmade after you read about her finish!  And tomorrow Heather has a super cute Valentine's tutorial, make sure to stop by!


I hope you all had a wonderful weekend. We had a lot of fun, the weather was gorgeous, not a small thing for Chicago, so we got to spend lots of time outdoors with our kids.

Not only that, I also got a lot of sewing done and managed to GET MY HST QUILT FINISHED!!!! It feels wonderful to be able to say that. I have no idea why I was in such a rush to finish this quilt (since it has no specific purpose or recipient), I just HAD TO get it done. And I absolutely love how it turned out. 


This is what the quilt top looks like after being sandwiched, quilted, bound, washed, and finally dried. It is a pretty big quilt, 70 x 72 inches. I had my girls stand on chairs and hold it for me so I could take a picture - I think they did a pretty good job considering that the whole time they complained about their arms hurting. 


In my last post I was debating about what to do for the back, not wanting to make it just one plain color. I came up with this:

It almost looks like a skyline, doesn't it? No, it wasn't really a plan, the whole quilt back looked very different in my head when I started. I love that by cutting the fabric, sewing it together and arranging and rearranging pieces, adding more here, snipping away there, I ended up with my own unique design for the back.

I decided to go quite simple for quilting, I did horizontal and vertical straight lines (I'm going to try some more advanced quilting on a smaller quilt).

I made binding using one of Denyse Schmidt's fabrics available at JoAnn's. I think it frames the whole quilt rather nicely.

All in all, I couldn't be happier with how it all turned out. And not only is it great for snuggling, it's also perfect for playing peek-a-boo with our cat who thoroughly enjoys my love of fabric.

It is the first quilt I designed from scratch all by myself and I enjoyed the whole process of making it a lot. But next time I will use my Go!cutter to get my triangles cut and thus eliminate all the crazy need for trimming. Yes, trimming was definitely the least enjoyable part for me.
Well, that's it from me for today, as I have piles of laundry and tons of housework that needs to be done.

Have a wonderful day.

Svetlana

Photobucket

Thursday, January 19, 2012

A Quilt for Baby Belle

Warning: Picture Overload

I've got another quilt finish (Megan), so I had to sneak in my own feature :)  My sister-in-law just had her first baby, a sweet baby girl Annabelle.  I called my SIL a few months into her pregnancy and asked her what colors she liked.  She said she was really into yellow, pink and brown.  Well just prior to that Heather and I got the whole line of Just Dandy.  Perfect right?  Except that I had the blue/green colorway and Heather took the pink/yellow colorway.  AND I had already used mine on these messenger bags.  Sigh.  After a lot of pouting and bribery (and more pouting) Heather gave me some.  I don't think there could have been a more perfect line!


I went through several designs with this, all of them were HST though :)  At one point it was a zig-zag quilt.  Ultimately I settled on this design and I liked having the pink/cream double hourglass to offset the yellow.


I used some leftover Peacock Lane for binding. I need more of those fabrics, amazing for the stash, seriously.


I also gave baby Belle Lola's Quilt :)  I figure if I ever have a girl I will want to do all pink/red/purple for her.  Already having two boys I literally have blue and green in every room.


I used Joel Dewberry's Heirloom for backing.  I straight stitched about 1/4" on the sides of the seams.  It made a neat pattern and I love the six-pointed stars in the middle.


Next I had to make her one of my Carseat Canopy's from Oh Baby!.  I used felt for the flowers and added a pearl in the middle.  I loved working with so much pink!  Here's the supplies you need for the flowers:


Two colors of felt, scissors (these teflon Havel's are my fave...they're really really good!), glue gun and disappearing ink pen.  I used the cup opening for the lighter pink and large circles, cut 4.  From the bottom of the cup cut the darker pink, cut 4.  Fold in half twice using the glue gun to keep in place. Arrange like below and add a pearl or two to the top!  Ta-da! How's that for a mini tutorial??


I also made her a nursing cover with Midnight Garden from Michael Miller.  Those come together fast...some boning and D-rigs and you're good to go!  Got to have one of those right?


I made an extra flower with a hair clip on the back.


Seriously it was so much fun to make girl stuff!  And it felt nice to go "overboard" since it was for a niece...now to get to meet that sweet baby girl!  They're in Florida and we're in Arizona, so it may take some time but it'll happen. Until then Skype will suffice.

Thanks for stopping by!

Photobucket

Thursday, March 3, 2011

FINISHED QUILT! FABRIC giveaway!


FRESH SQUEEZED FABRIC GIVEAWAY and TUTORIAL

and
I am finished! I did free motion stippling all around, and I LOVE it a lot! I did super tiny stitches, and it took me 4-5 hours. (is that embarrassing? do you all do it in like 45 minutes) It is the biggest quilt I have done. I am loving playing with my machines free motion quilting, plus, if I add my girl math, that is another $50 less the cost of my machine. (remember every time I machine quilt a quilt myself, I get to deduct $50 off what I paid for my machine) My husband said "soon I am going to be owing you money"...thats the spirit!  

Don't you just love the just out of the dryer crinkliness? (is that a word, I was sure it was, but spell check sure thinks it isn't)


EASY TUTORIAL
1. Create six dutch pinwheels here
2. Assemble the 6 pinwheels according to quilt photo.
3. Add 2" brown stop borders
5.  Add 6" outside borders
Finished quilt size 50 x 68
 Now on the the fun stuff!  Fresh Squeezed fabrics is giving away this stack of fat quarters that I used to make this quilt!

These are the fun fat quarters just waiting to jump in the mail to you from Randi at Fresh Squeezed Fabrics


 If you would like to win, you have three chances, leave a separate comment per entry:

  • If you were stranded on a island, which celebrity do you want with you to repopulate the earth, what dessert would you bring, and what craft project...?
  • Another comment if you are a follower 
  • Peak on over to Randi's shop and tell us what you like...
ENTRIES FOR GIVEAWAY THROUGH MONDAY MARCH 7th, WINNER ANNOUNCED TUESDAY MARCH 8th.

This giveaway is now closed.

Photobucket