


The winner of the POPPY SEED FABRICS giveaway is:
 Emily said...
My best birthday was when my husband threw a party for me with all of our friends.
It was the first time I'd had a real birthday party since I was a little girl!
Today we have Gentri from Little LuLu's Nest. Gentri and Megan are good friends, she should probably be writing this intro :) They met while their husbands were in medical school together. Gentri and her sister Brayli have a darling blog, and etsy shop. Their blog is full of fun tutorials, recipes and general crafting. They are super duper cute fun sisters!
Here are the Holiday Gift Tutorials past and upcoming:
December 14th: Gentri from Little Lulu's Nest
December 19th: Erin from Why Not Sew?
hello, I'm Gentri from Little LuLu's Nest
and I'm excited to be here
at Quiltstory
Megan and I met while our
husbands were busy studying 12+ hours a day...
and I am happy to say I've met Heather as well
at this year's quilt market
and they are both beautiful, fun, talented ladies!
I've come up with a fun, last-minute neighbor gift
that is so versatile, and can be
personalized any way you'd like
and best of all it's {cheap} and {easy}
hoop-art ornament

1. start with your embroidery hoop,
the smallest hoop you'll find is 3 in and that's perfect
for a little personalized ornament.

2. cut out your background fabric and leave
some extra fabric around the edges for later on.
{i used a linen blend for 2 and a cotton pattern for 1)

3. next i "google imaged" the shapes i wanted to work with
and simply traced those onto paper
(or if you're awesome and can free-hand any drawing, that's easy too)

4. cut out your desired shape and pin to felt
and cut out your felt piece

5. simply glue the center of the shape onto
the fabric in the hoop
(fabric glue works wonderfully)
I chose to do 3 different ornaments
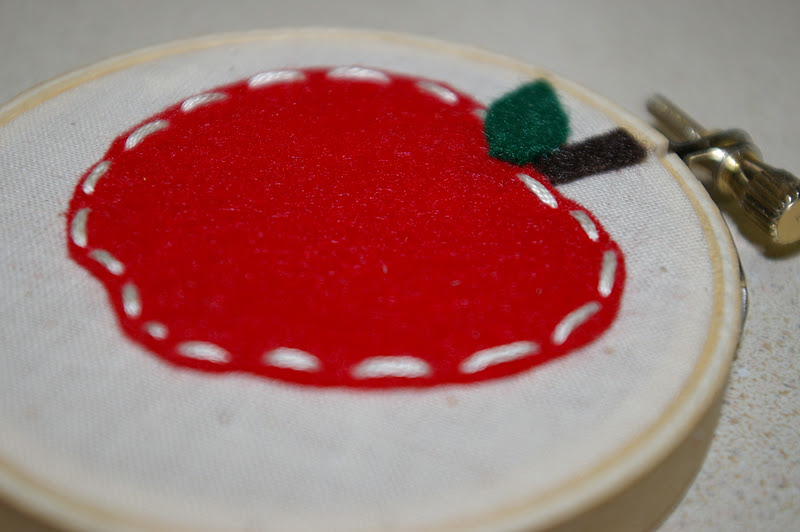
an apple for my son's teacher
a "T" for a family friend
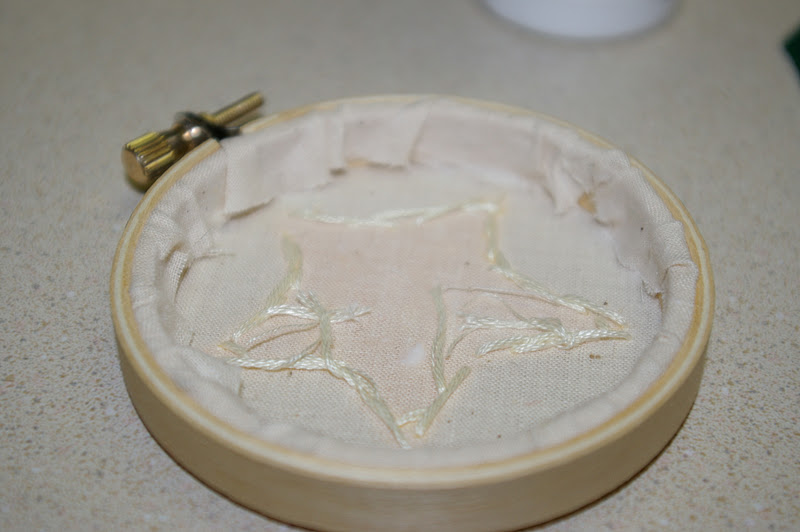
and a star for a neighbor
this is the fun part,
the possibilities are endless
a "1" for a couple's first Christmas
or a baby's first Christmas
a date
2011
an initial
a snowflake
the word "JOY"
etc
etc

6. with cooridinating thread
hand-stitch the outside of the shape

7. lightly glue your leftover threads
out of the way of the edges, like the above picture
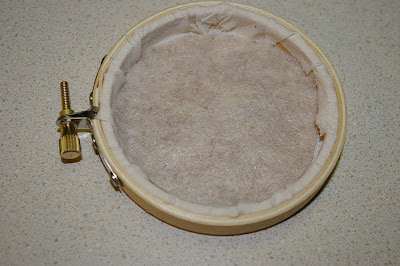
8. next, glue around the inside of the hoop
around the back and tuck in your fabric
9. cut out a small felt circle and glue to the back of your hoop
this way the thread's stay in place and it gives it a nice finishing touch
10. that's it.
you have a cute, personalized ornament
to gift to someone

...last, but not least
tie some twine, ribbon, thread or yarn
to the clasp at the top.
that way it can actually hang
like an ornament

I'm attaching my hoop ornaments
to little jolly treat bags
and spreading the joy of Christmas

thanks for hanging out today
and come stop by and say hello or check out my etsy shop
i'll be posting a gingerbread cookie recipe later this week
if you need a little treat for those bags :)
Happy Holidays,
Gentri


