Photobucket Photobucket Photobucket Photobucket Photobucket Photobucket Photobucket Photobucket Photobucket Photobucket Photobucket Photobucket Photobucket

Friday, May 30, 2014

Color Strip!

Happy Friday everyone!  Such an odd week since Monday was off...I've been a day off all week!

About a month ago I posted on a local FB page to see if any other moms were interested in doing a busy bag swap.  A "busy bag" (as we defined it) is a small activity for a toddler-preschool age child that can fit in a gallon size ziploc bag.  They are perfect for restaurants, church, dr appts, etc..


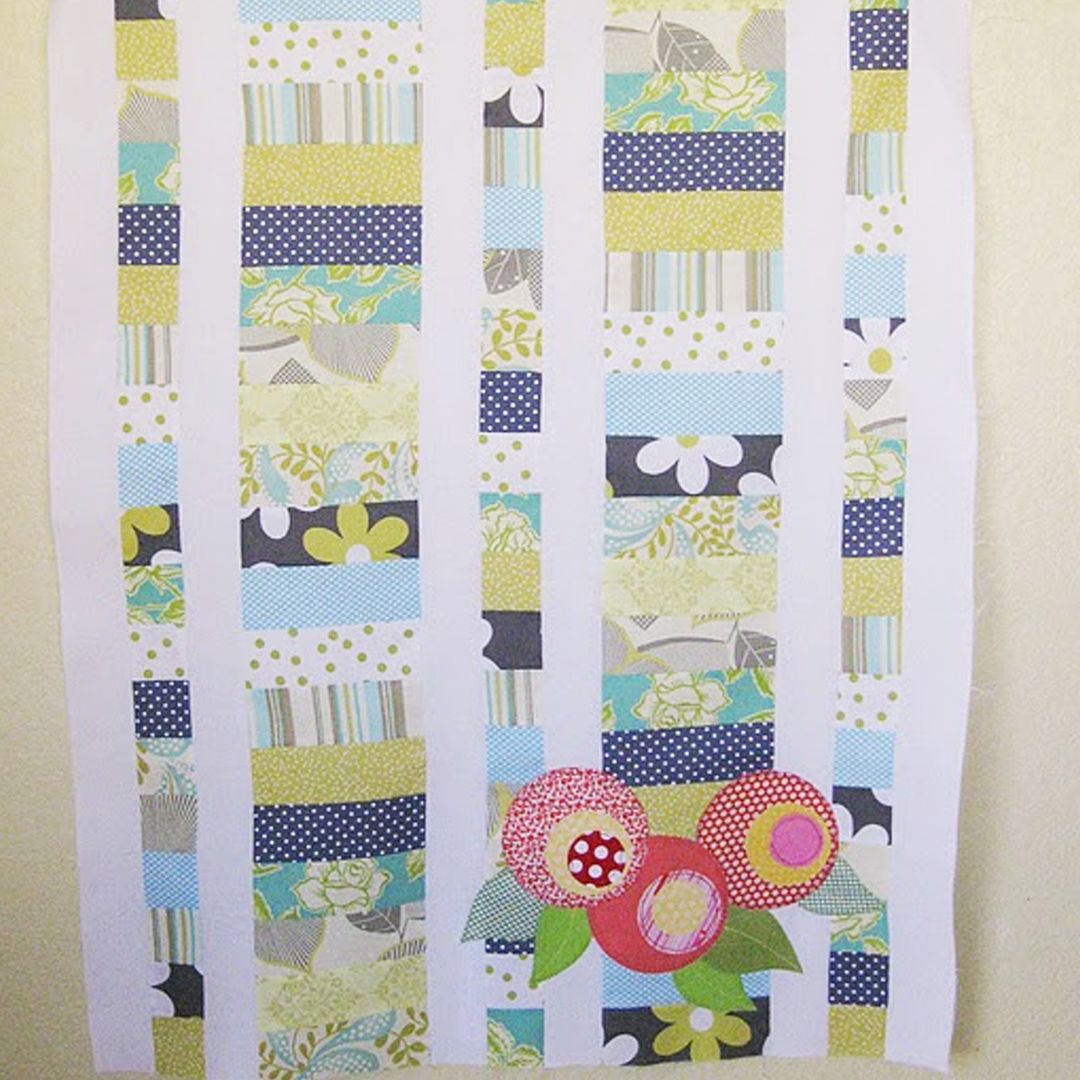
The great thing about a swap is we each created our bags eight times, easier and cheaper!  And then we swapped!  I made these Color Strips.  I searched pinterest all evening for my idea.  I just knew I wanted something that used fabric lol :)


I came across a pin from this shop.  It was the perfect activity for me to create!  I stripped pieced the whole thing, they're 4.5" strips CUT (4"  squares finished).  I added ribbon on the end so they can be rolled and tied together.


Most of the items to color match I found at Dollar General but I did pick up a few from Joann (and my own random stuff!).  Every color has at least 3 but some like pink and blue have quite a bit more!


I made 9 (I only needed 8) but my strip piecing made 9 so I may as well!  I have a sweet little niece who would love a game like this so I'll send a little pack her way.


There you have it! I hope you enjoy your weekend!!
Photobucket

Tuesday, May 27, 2014

Fabric Tuesday IS ON!!

Did you know yesterday was Memorial Day Monday??  That would make today TUESDAY.  Yes my son was an hour late from school and then I received a text from Heather..."Aren't you on the blog this week?"  Oops!!

Okay so because of this I'll just do a couple features so we can jump right into linking!

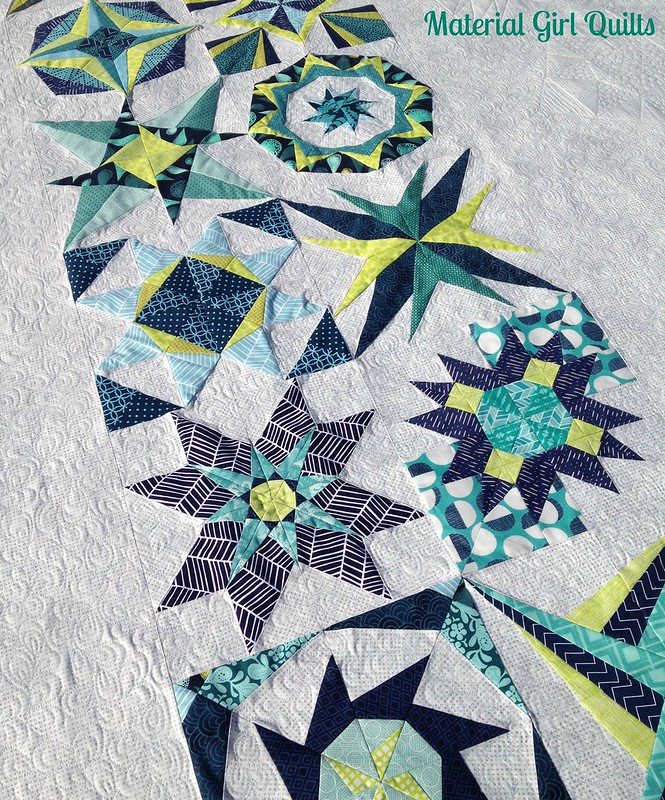
Lucky Stars quilting detail


Fabric Tuesday!!
Link up below ANY project that includes FABRIC
Link as many as you want!! (within the last couple of weeks)
See new bloggers and comment on their projects!


Photobucket

Saturday, May 24, 2014

T-shirt dress and a birthday!


Today is Megan's birthday (yay!!!) And to celebrate she's giving away a custom T-shirt dress for a little lady of your choosing!! The giveaway is on INSTAGRAM so follow her @quiltstorymeg and see her post about it. Follow me too while you're at it @quiltstory ;)


Wednesday, May 21, 2014

My Bright Colorful Rainbow Polka-dot HST mini quilt...

Heather here. 
If you have been following me on Instagram (@quiltstory. Megan is @quiltstorymeg.) you have seen this all before. My bright colorful rainbow polkadot HST mini quilt. (that's it's official name)


Started with a bunch of 3.5" HST's


Found the block on Pinterest. Pretty easy layout. Did some straight line quilting. (super easy since it was a mini)


Even went with some colorful polkadot backing and binding, over the top, I know. 


Ta- Da! I just love the pop of metallics. They are Michael Miller mirror ball dots. Love. 


And I even have it up on the wall with a few other watercolors, embroideries and another mini. It makes me happy. Hope you like it!


Photobucket

Tuesday, May 20, 2014

Quick Quilting Tip and Fabric Tuesday!

Hey friends and new friends!! We're on the stop today from Amy at Diary of  a Quilter to share a Quick Quilting Tip!!


We're two sisters, Megan and Heather, who blog about all things sewing, creative, quilty, all the fun stuff!  We design quilt patterns that can be found here in our shop!  We'd love for you to look around our blog, check out Fabric Tuesday (at the end of this post) and find us on Instagram @QuiltStory and @QuiltStoryMeg

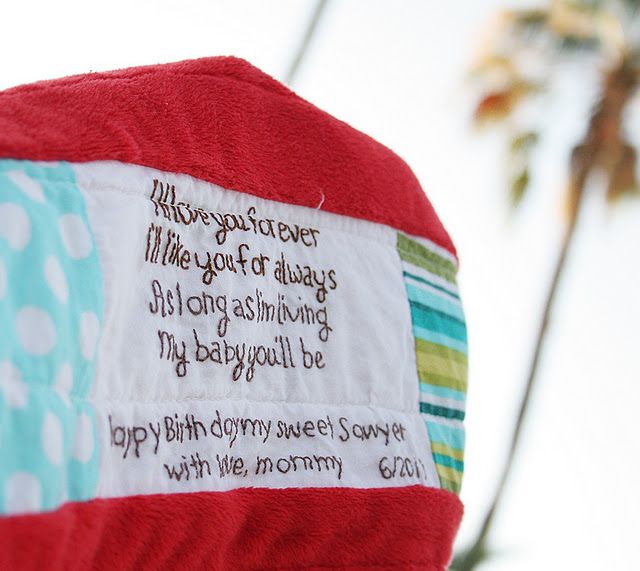
We were excited to do this little tip for Amy's series. Labeling the quilt. Sometimes the most special touch to a friend and child is the personal touch a label offers.

I am getting better at labeling my quilts, I'm pretty excited about that!  So many quilts Heather and I do are not necessarily for anyone in particular and often hang in shops...but the more quilts I've been making for family and friends I've decided to make them more personal. Thanks for the visit, and we hope you enjoy this simple tutorial...

Step 1
Type up (or write by hand) whatever you'd like your label to say.  I can rarely get through the children's book Love You Forever without crying, just reinforces my love for my little boys!!  (If you somehow do not know of this book you need to read it immediately!!  Children or not, if you're human you'll be touched!!)  I chose to use the lyrics from that book.  Remember to keep in mind the size of your block, I put a box around mine for reference (I use Photoshop).  I think it's important in a label to include the date and your name.

Step 2
Using a fabric pen (one that will wash out) copy the text onto your quilt block.

Step 3:
Put an embroidery hoop around the block.  Stitch the text using a simple backstitch.  Below is a step by step of how to do the stitch.  Click to enlarge.

Step 4:
Finished!  I've got extra lines in there to center it...

Here it is in the quilt!  It is on the back, a strip of blocks along with the quilt tag and I also appliqued his name.  I have a tutorial coming up showing how Heather and I like to applique.  Sorry to be so lame, I don't have a reveal of the quilt yet!  But hopefully by next month :)
I'll love you forever
I'll like you for always
As long as I'm living
My baby you'll be

Other miscellaneous information:
I'd recommend using a piece larger than your block (while still keeping the embroidery in the right size).  You have to consider the embroidery hoop, plus it's easier to work with and trim to size when finished.

I used DMC embroidery floss.


And don't forget to check out Amy's new book if you haven't!  Awesome Amy!!!


Welcome to Fabric Tuesday!
Fabric Tuesday #186
Here you can link up any projects that you use fabric to create!  It can be WIPs or finished projects!  Take time to visit others, that's what makes a linky party fun!


Friday, May 16, 2014

Adding More Handmade to my Life

I've decided recently I want to add more handmade to my life...I sometimes feel the things that surround me with in my home are not necessarily the things that make me happy.  I like to walk in my home and be happy about what I see (underneath and behind all the toys, dust and clutter).


I was having a sad day and decided I needed a project to start AND finish.  I decided on this mini quilt/runner for the perfect spot in my family room.  I made these sweet little Churn Dash blocks, 6" each.

(And don't they look cute on point??)


The sashing is about 2" finished (I believe).  Simple straight-line quilting.


My gallery wall has a lot of meaning to me.  The US map has hearts in all the places we've lived since we've been married (UT, MO, AZ and VA).  I have beautiful framed art with words from my dad and his initials, all backed with the Union Jack flag.  My dad's double decker buses, he had so many and he would let my boys pick them off the shelf and play with them.  Beautiful figurine of a daddy and his three daughters gifted to me from my sweet cousins.  Pictures of my kids that really make me happy.  Our 2013 family book of all our adventures last year.

It's the first spot in my new home that really feels like me.  I'm excited to create more!

-Megan

Thursday, May 15, 2014

Baby Girl Handmade Overload

 I've been on a kick lately of making things for my little lady Lucy.  It is so fun making things for girls!! I've made stuff for my boys, but beyond pants/shorts when they were little and bow ties there isn't much else.  I guess I just make up for it with her!
I picked up a bunch of t-shirts at Old Navy last fall for $2 each.  I chose some coordinating prints for each one planning to do a t-shirt dress and two bubble shorts.

Her "Lucy" outfit, which I adore.  I just appliqued her name using a fusible web. It takes time and patience sewing that thin but it's worth it!  Then the shorts I just used the "panties" pattern from a Simplicity dress pattern.  Instead of adding elastic at the leg I gathered it and added a cuff.


And last week I shared her t-shirt dress (as you can see I changed the fabrics I originally set aside).  The tutorial is here.


And this sweetest little dress my mom made for her.  I love that light aqua floral from Tasha Noel's Simple Life line.  I just finished the diaper cover to match...she's wearing this one on Sunday :)


Well there are some sweet little things I've been up to (and my awesome mom). It sure is fun the variety of things you can make with a sewing machine and fabric!


Photobucket

Friday, May 9, 2014

T-shirt Dress Tutorial!


Last week I whipped up a T-shirt dress for my little lady.  They are sooo easy and perfect to use for an old t-shirt or a plain one on clearance (like me) :)


Simple, fun little play dress!  Want to make one too?? Let's get started!


Supplies:
T-shirt
1 print 4" x WOF (width of fabric, about 42")
1 print 5" by WOF
Optional tulle 5.25" wide

**Keep in mind the longer the WOF (42") the fuller the gather with the skirt.  My t-shirt size is 18-24 months.  If you're using a larger t-shirt you may consider increasing the length.


Cut each piece as listed above in supplies.  Join ends to make a continuous circle, stitch and press.  Turn and iron the hem under once and again for a finished edge to the hem.  Stitch around.  I turned a little more than 1/4 inch each time about 5/8" total.  (For the tulle all you need to do is stitch it in a continuous circle, no need to finish the hem)


Place all three pieces inside each other (like above).  Stitch around the piece to secure them all together.  If you have a serger, awesome, if not use a zig-zag like me.  This will help with fraying as the garment is washed and worn. 

Gather.  Do the longest stitch your machine will allow.  Stitch around the top of the skirt.  Leave a lot of thread before you start to stitch and when you finish the stitch.  Taking one thread at a time slowly pull and the garment will gather.  Take your time, if you break the thread you'll have to stitch the whole thing again.  Pull from each side.  Match the gathered skirt to the size of the t-shirt.


Place the skirt inside the shirt.  Pin all around.  Sew together!


Inside.


I did cut her a coordinating headband, I could resist!!


I cut it on the bias (so it has stretch).  Finished the edges and tied it directly on her head.  Because of the stretch it stays on well and can easily be pulled off and on (keeping the knot in place).


Ta-da!! Really easy sweet little play dress for the little lady!


Have fun!! Let me know if you have any questions!

T-shirt: Old Navy
Lace and Hounds tooth prints: Michael Miller Fabric
Tulle: Hobby Lobby
Photobucket