Photobucket Photobucket Photobucket Photobucket Photobucket Photobucket Photobucket Photobucket Photobucket Photobucket Photobucket Photobucket Photobucket

Tuesday, October 30, 2012

Fabric Tuesday, come share!

Welcome to Fabric Tuesday!

Last Saturday my parents left and went back home, leaving me to be a mom of three alone! Scary!!  Today was a success...we're all alive.  I told my husband that was all he could expect for today.  While my mom was here we took on several projects that I will be sharing, including making a special blessing dress for Lucia!  However this week I'm sharing your projects, so many great ones to choose from!

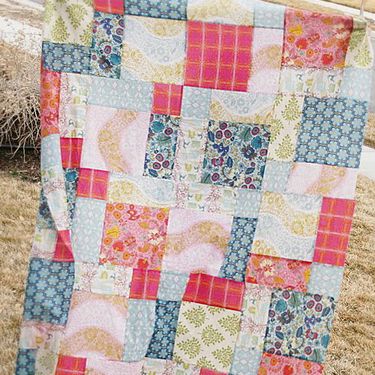
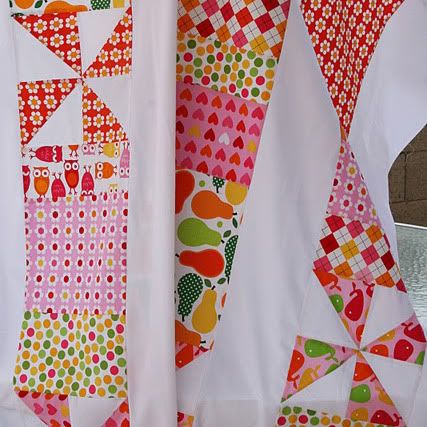
Dizzy Diamonds Quilt from that girl...that quilt

Bike wash bag 
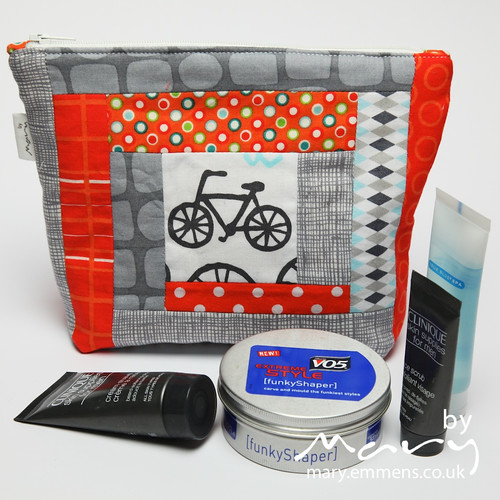
Zip Purse from by Mary

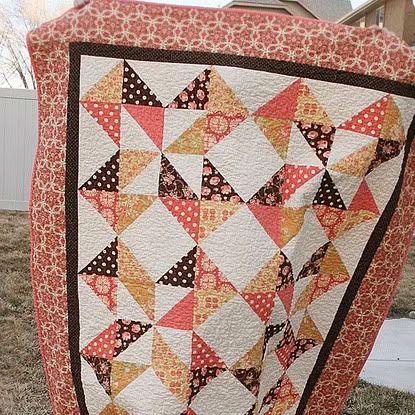
Summer in the Park Quilt from England Street Quilts

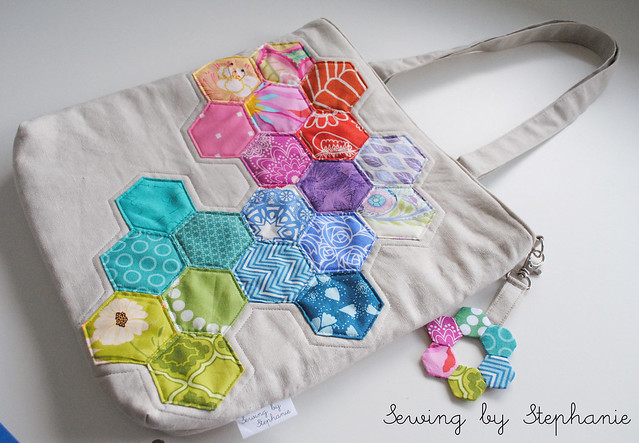
Mouthy Stitches 2 Tote Front
Mouthy Stitches 2 Tote from Sewing by Stephanie (LOOOOVE this!!)

Your turn!  What have you been crafting lately?
Fabric Tuesday #109
click here for more information


Photobucket

Monday, October 29, 2012

Baby Gown Tutorial


I never had any baby gowns for my boys, strange I know because so many mommy's swear by them! I'm so excited to have some for my newborn.  So far I love them and haven't even experienced the convenience!  The sweet knits I used in the gown above are The Sweetest Thing from Riley Blake.  It is a really breathable knit with great stretch.  So easy to make, want to know how?

Let's get going!

Materials Needed:
Onesie (it would be great to recycle some old stained ones)
1/2 yard of fabric or fat quarter (knit is best but you can use a cotton print too, I did both)
14" elastic OR 22" ribbon depending on how you want it to tie at the bottom
Extra ribbon for bows or trim
***measurements are given for a newborn size onesie, you can make small adjustments to the numbers based on your size of onesie***

Figuring Your Numbers
Determine if you would like to gather your onesie or have it pleated in the front.  My onesie is 14" around the chest.  For the gather I added 1" for seam allowance and 21" for a gather, total 22" wide.  The gather is 1.5 times your measurement, 14 inches here.  For a pleated front add 1" seam allowance, 4" for pleats, total 17" wide.  Cut your knit or cotton fabric to 22" length. Here's a little formula:

Pleated Front: chest measurement + 1" (seam allowance) + 4" (pleats)= width of cut x 22"
Gathered Front: chest measurement + 1" (seam allowance) + 1.5 times (gather)= width of cut x 22"

Measure and trim off 1.5" below the armpit on the onesie.

Use 1/2" seams.

Attaching the Onesie

This step is only if you want to tie the bottom with a ribbon, skip if you're using elastic:  Fold the gown fabric right sides together.  From the bottom measure up 2 1/4".  Mark on the gown at 1 1/4" and 2 1/4".  You will not sew in-between this 1" mark.  This is how you leave an opening for the ribbon.  (I forgot this step that's why mine is sewn in the photo, I just unpicked it :)


This step is for both types of bottoms, ribbons or elastic.  Take the gown fabric and place right sides together so it creates a tube.  Sew the length of it, press and turn right sides out.


To gather, use the widest stitch on your machine, sew around the top where you will attach it to the onesie.  Slightly pull and gather until it fits the width of your onesie.  With onesie and gown right sides together pin in place. 

To pleat, refer to images below.  Find where the center will be on the front of the onesie, measure out 1.5" on each side and turn fabric in on itself 1/2".  With onesie and gown right sides together, pin in place taking care to match up the centers.  


Sew onesie and gown together.  Press the seam down towards the onesie.


Finishing the Bottom With a Ribbon Tie see below for elastic finish

Back to the bottom.  Press the bottom of the gown 1/4" on itself.


Next fold and press 1" up, pin in place and sew around the entire bottom.  Your opening will be on the front of the gown, the 1" section you left un-sewn at the beginning.


See?  Nice and pretty opening.  Feed your ribbon through.  Done!


Finish the Bottom with Elastic

Fold and press the bottom of the gown 1/4" up.


Fold and press the bottom up again, using the width of your elastic to determine how much.  I used 3/8" wide elastic so I made the casing about 5/8".


Sew around the bottom leaving about an inch open to feed your elastic through.  Feed through, attach the elastic ends with a tight zig-zag, sew the opening closed.


Finishing!

Add any cute little embellishments!  I added this sweet trim to one, love it :)  I only added it to the front because it didn't have any stretch.


There you have it!  Some seriously sweet baby gowns :)  Let me know in the comments if you have any questions, hope you'll make some and thanks for stopping by!


PS...I used the B&W damask for Lucy's take home outfit!!  Sweet right?  I can say now that I've used them I definitely prefer the thinner stretchier knits for the gowns.  From the prints in this post it's definitely the Riley Blake knits.


Photobucket

Wednesday, October 24, 2012

Holiday tutorial, Handmade by Kirsty...

Check out this lovely little lady Kirsty. Lovely projects all over her blog that I browsed and browsed when I first came across it. Just swoon over these lovely little finished projects of the year. And she has only been sewing since May! (should we warn her???). I really hope to make some of these little scented pillows, I wish I had one now to throw in the micro and warm my freezing toes! (guess it will be my poor husband's legs again) Be sure to visit Kirsty's blog and give her a welcome...

If you missed our other Holiday tutorial projects, see 12 pocket bag, Holly Berry Pillow Cover, and Hexagon Handle Holder. Be sure to visit Thursday's through the rest of the year for some more gift ideas. 

Hello, my name is Kirsty and you can find me blogging at allhandmadebykirsty.  This is my first guest blog and tutorial so thank you to Heather and Megan! I am a little excited!  I have only been sewing since May 2012 but have found a real love for it and spend a lot of time reading other blogs for inspiration.

My tutorial is for scented pillows which are very easy and a quick stocking filler.  These are great for putting in drawers or if you scent it with lavender they can assist with sleep and relaxation.


Materials:

Fabric Scraps

Ribbon (if you want to make a ribbon pillow)

Coordinating Thread

Water Soluble Pen (optional)

1 lb or 450g Rice (uncooked)

Essential Oils


For the pillow:

Cut 2 pieces of fabric 51/2"x31/2"

For patchwork:  Cut 4 pieces 11/4"x11/2"  (or if you are making a few pillows, cut strips of 11/4" wide)

For stripes:  Cut 2 pieces 11/2"x31/2"

For ribbon:  Cut 2 lengths at 31/2"

Step 1:  Mix uncooked rice with 15 drops of essential oils in a zip lock bag.  Allow the rice to sit for a couple of hours to dry.


Step 2. Sew patchwork or stripes together.  For patchwork sew the 11/2" edges together and press seams.  For stripes sew 31/2" edges together and press seams. (seam allowance is 1/4" throughout)


Step 3.  With your pen mark each long side 1/4" in from edge and press along that line.


Step 4.  With one piece of pillow fabric, right side up, pin patchwork 21/4" in from the left side and top stitch along each side. Or for the stripes, pin 2" in from the left side and top stitch along each side.


For the ribbon I placed the first strip 11/2" in from the left edge and allowed 1/4" gap in between.


Step 5.  Pin pillow fabric, good sides together, and mark 3/4" in from each edge on one short end.  This will be your guide on where to start and end stitching.  Sew from top right corner around to your other pin.


Step 6.  Trim corners off and turn out the right way.  You can use a stuffing tool or a chopstick as I do to push your corners out.


Step 7.  Press pillow, making sure the opening is pressed inwards.


Step 8.  Add scented rice to the pillow.  I used approx 1/4 cup.


Step 9.  Lastly, top stitch around the outside of the bag, ensure
that the opening is caught in the top stitch to seal the pillow.  When you
reach each corner give the pillow a shake and move the rice to the opposite corner.


Then all that's left to do is wrap your pillows.


Photobucket

Tuesday, October 23, 2012

Fabric Tuesday and missing my sister...


First I've got two giveaway winners!!! Woot woot!!

First the winner from our Sweet Celebrations Tour who has won a book and fat quarter bundle, congrats to:


Gale, Ky quilter said...
I love all kinds of sewing. I make quilts of all sizes, bags & totes, clothes for my grand daughters. I love all things quilty. :) Right now I am working on a Dresdan Plate quilt, among other things, lol. Thanks for an awesome giveaway!

Second the winner from the Fabric Shoppe giveaway of a 7 yard bundle Aneela Hooey's holiday line ($75!!), congrats to:


B Greene said...
I also follow Jody's Pinterest boards.

We picked out these beautiful finishes from last week. You guys are simply amazing every week, seriously! Megan just texted me this tonight "I'm staring at my stash and in my soul all I wanna do is chop it up and sew sew sew!!" That is why she is not only my sister, but BFF! Love her and miss her, hate living so far apart.

This sadness from that few weeks has been consuming, and me and Meg both feel if we could just get together and sew the night away, it could bring a lot of healing...

Anyway, for now, just more to be inspired by for when we actually do get together and sew...

Sea Glass on Sand

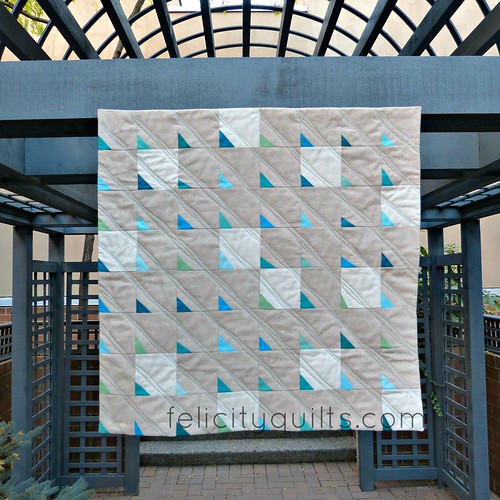
Felicity quilts , just fun and modern, love the odd triangles and quilting.


Cityhousestudio, bright and cheerful, makes me happy.


Gemini-stitches , makes me want to finally work on my granny squares, sigh...gorgeous!


Busy hand quilt love, simple, bright, and an exact replica of some prints on my shelf waiting to be sewn!


Fabric Tuesday #108


Monday, October 22, 2012

Focus quilt from Fabric Mutt...

Heidi from Fabric Mutt created this super great FOCUS quilt. I just love this quilt. Love these little Polaroids with the perfect fussy cut images. Love the off centered one in the third row down too. Heidi makes some cutie projects on her blog, also some awesome tutorials. She is part of several swaps and makes the cutest things! Be sure to visit Fabric Mutt to see some fun creations...


I'm in love with this little quilt.

Polaroid blocks take a bit of work to get the fussy cutting just right, but the end result is worth it. My husband is the one who suggested turning the berry block askew while leaving the others in straight rows, and I love the way it looks. I kept the quilting simple -- just two intersecting lines of hand stitching in red thread. With the picture theme in mind, I'm calling this quilt "Focus."


I wanted all of the prints to be Lizzy House except for the Kona solids in white and coal, so I used some leftover pieces from Hello Pilgrim and Outfoxed for the back along with one of the blocks. I enjoy using her pearl bracelet prints for quilt binding; they really make an interesting frame. Though I hadn't originally intended it, the red and green in the quilting and binding perfectly match the colors in my featured berry block.


Lizzy House's designs hold a special place in my heart. They were some of the first designer fabric I ever bought. I knew when I first saw them that my children would love them, and I couldn't help loving them too. While I've used most of her fabric to make items for my daughters, this quilt is for me. I have it hanging next to my desk where I'm going to enjoy looking at it every day. It's a great reminder to me to focus on the small but important things in my life, and to remember why they matter.


Photobucket

Thursday, October 18, 2012

Holiday Tutorial: 12 pocket bag from SewCalGal

Our third tutorial today in our Holiday Tutorials series!  Every Thursday into December we're having guest designers and bloggers share a tutorial that you could use as a gift this holiday season.  SewCalGal is sharing her fabulous bag that can be used in all sorts of ways.  I wish I had a tally on how many bags I've made!!  Love this version too, can't wait to try it out.  Check out SewCalGal for some inspiration on all things sewing, quilting, embroidery.  She shares her favorite products, designs, tools, etc..  Thanks so much for sharing with us today!


Hi!  This is SewCalGal.  For those that may not know me, I'm a blogger that focuses on research and sharing insights about those in the quilting, sewing and/or embroidery business, as well as events. On the internet, I prefer to be known as SewCalGal as I want the focus to be on those in the business and not on me personally (I live a boring life and am not that talented).

SewCalGal  host's the annual Golden Quilters Awards every Spring, which is like the Oscars for those in the Quilting business, as well as other events.  You can help to nominate and vote to ultimately give recognition to those in the business in a variety of categories (e.g. Best Teacher, Best Author, Best Designer, Best Product, etc.).

I'm currently hosting the 2012 Free-Motion Quilting Challenge where 12 FMQ Experts provide a tutorial every month.  I also host Fun Friday Giveaways which allow me to showcase a sponsor and their product(s).  And,  I'm currently working on plans for some fun events to be announced early next year.

I'm delighted to be here today on the Quilt Story,  and want to share a tutorial to make a very handy tote that also makes an excellent Christmas gift, as well as a bag for a Christmas gift.  But I use this pattern throughout the year for a variety of gifts and fundraisers.  I've shared the complete tutorial for this bag on my blog previously, so today I'm sharing a reduced version with more insights on how to take this design to make it your own, as well as ideas on how to use it.

Time to talk about this very easy &; fast bag that you can make for Christmas gifts, or for a variety of uses:


Here are my favorite ways to use this bag:

- make with Christmas fabrics and fill with a Christmas present

- make with garden theme fabrics and fill with a small potted plant, seeds, or gardening tools

- make with nautical or beachy fabrics and  fill with beachy things (e.g. beach towels, sunscreen, visors, etc) to give as a gift, or use at a fundraiser.

- fill with fruit or baked goods to give to someone as a thank you gift.

- fill with fabric, rulers and quilting supplies to give to a quilting friend.

I've also machine embroidered names on the outside of the bag to personalize it, as well as embroidered various designs to give the bag more interest.  There are so many fun fabrics that can make this bag look great, as well as make a special seasonal bag.    The above bag was made from fabrics in my stash and used in a fundraiser for Susan G. Komen for The Cure.  It was filled with various goodies, including a bottle of wine in a matching wine bag.  I remember how excited the winner was to receive it!

When using this bag at a silent auction fundraiser, where I need to to stand up firmly, with items inside, I will recycle cardboard boxes and place two large pieces on the inside of the bag, filling the space between with goodies to fill a gift basket, where it overflows.  I will then typically wrap the entire bag in cellophane and add a bow, to allow the gift basket (bag) to have good visual impact.  It always has a good ROI at silent auction fundraisers.

Do you have an idea yet for how you can use fabric in your stash, or buy fabric to make this bag for your use or for a gift?

With 12 pockets this bag is popular with quilters that take items to workshops and/or sew-cials, as well as grocery shopping.  It can be made in a variety of sizes and fabrics.  And, you may want to adjust the size of the pockets, or number of pockets, depending on your preference.  You can also adjust the size of the pockets depending on which fabric you want where.  The measurements in this tutorial are for the deeper pockets, but take a look at the photos of the bag with the black/darker colors and you'll notice I used smaller pockets.  I've made these bags with a variety of size pockets, but have come to personally like the deeper pockets, depending on what focal fabric I select for the pockets.

This is also an easy bag for experienced bag makers to add a zipper.  Again, there are many options to take this design and make it your own.


While I am not a professional pattern maker, I wanted to share my pattern with you. You have my permission to make bags using this pattern for your own use, for gifts, or fundraisers, but not for personal profit.


SUPPLIES NEEDED • Fabric A: Fat quarter for lining

• Fabric B: Fat quarter yard print for bag

• Fabric C: Fat quarter for stabilizer (*)

• Fabric D: ½ yard for large pockets

• Fabric E: ½ yard for small pockets

• 3 ¼ yards web for straps

• thread to match web


CUTTING STEPS

o Fabric A: 2 pcs 18" x 18" (lining)

o Fabric B: 2 pcs 18” x 18” (bag)

o Fabric C: 2 pcs 18” x18” (stabilizer)

o Fabric D: 2 pcs 22" x 18" ( large pockets)

o Fabric E: 2 pcs 16”x18” (small pockets)

o 2 pieces of web for straps, each 58 1/2” long

(*) Stabilizer is optional if Fabric A and/or Fabric B is stiff. I sometimes use canvas for Fabric B, or vinyl for Fabric A, and then I do not use stabilizer for Fabric C. But If both Fabric A &; B are lightweight fabrics, such as cotton, I will use a stiff stabilizer for Fabric C. And definitely when I decide to embroider on Fabric B, I use a heavy weight stabilizer.


BAG, BODY &; LINING STEPS

1. Stack Lining &; Bag fabrics together (A&;B), with right sides of fabric facing each other.

2. Stack stabilizer on top of bag fabric (B&;C).

3. Sew one side of fabrics using ¼” seam with right sides of (A,B,C)

4. Repeat steps 1 thru 3, to create the other side of the bag.

5. On flat surface (I prefer my cutting mat) open where print side of fabric is facing up (A&;B), in an open fashion (not stacked).


POCKET STEPS

1. Fold pocket fabric print in half crosswise: pocket should now measure 11 x 18 (D). Place folded D fabric on bag print fabric (B) with fold towards top.

2. Fold pock fabric print in half crosswise; pocket should now measure 8x18 (E). Place folded E fabric on top of large pocket (D) with fold side towards the top and cut sides lined with bottom of bag print (B).

3. Pin to hold in place.


STRAP STEPS

1. Measure and mark 5"-6" form each side of body unit: repeat for second body unit.

2. Cut web strap into two pieces, each measuring 58 ½” long.

3. Pin 1 piece of web strap inside marking starting at lower left edge looping web over top and continuing down right side.

4. Topstitch web in place starting from bottom edge of unit up to 1" below top. Repeat for second body unit. I like to topstitch my web strap down, using a ¼ inch foot with a straight stitch on each side of the web strap.


SEWING SIDES TOGETHER STEPS

1. Place both bag sides together, with front fabrics facing each other.

2. Match points together where straps meet, pockets meet, top of bag meets and lining meets.

3. Pin to hold together at match points, corners and as appropriate.

4. Sew a seam on three sides, leaving an opening at the top end of the lining {visualize a pillowcase}. I use a ¼” straight stitch seam, followed with a zig zag seam on the edge. But you could use a serger, as well as a 5/8” seam.


FINAL STEPS

1. Box corners of the bottom of the bag, to help it stand flat when used. I mark the corner the same on each side, typical 2-3” from the point.


2. Turn the bag where the bag fabric is on the outside and lining is on the inside of the fabric.

3. At the open end of the lining (the end of the pillowcase) you will sew and close by pressing a ½” seam, with the folded fabric of the lining going inside, towards the seam. Once pressed, pin the two sides of the lining together and sew ¼” seam to close up the lining.

4. Push the lining back down inside of the bag.

5. At the top of the bag, pin the lining down inside of the bag. Sew a ¼” seam around the top of the bag, holding the lining down inside of the bag.


Congratulate yourself. You’ve just made a bag following instructions of a non-professional pattern maker.

Enjoy!

SewCalGal

www.sewcalgal.blogspot.com


Print Friendly and PDF

Photobucket