Photobucket Photobucket Photobucket Photobucket Photobucket Photobucket Photobucket Photobucket Photobucket Photobucket Photobucket Photobucket Photobucket

Showing posts with label purple. Show all posts

Sunday, January 8, 2012

1001 Peeps quilt from The elven garden...

I just recently came across The Elven Garden, a modern quilt design blog. Jess from Australia made this fun 1001 peeps (just got some of that fabric myself) quilt for her 1 year old daughter as a Christmas gift. Love it! Here are some darling quilt finishes, she is selling them too! Be sure to visit her blog, cute fun stuff!

1001 Peeps - a finished quilt (yay!!)

I am ridiculously proud of this quilt. I absolutely LOVE Lizzy House's fabrics, and 1001 Peeps is no exception - and it leant itself perfectly to this pattern. The pattern is Fussy Framed Fairytales by Kate Conklin, and it was really fun to make. I love the fact that it wastes virtually NO fabric, and the floating squares border is really cool.


I actually deviated a little from the pattern - I started with 10" squares rather than 10.5" squares, which is why my floating squares aren't quite set in the right spots at the corners - although I think they still look okay. Apart from 1001 peeps, I used Kona solids in blush, hibiscus, petal and PFD. I quilted it all over using an echo shell pattern - time consuming compared to stippling (it took about 10 hours to quilt), but I love the result. And the texture of the quilt is amazing. 


The binding is Kona blush, and it's machine stitched at back and front. Finished size is about 50" x 65" (approximately - haven't measured it properly yet...)


Darling daughter loving on her quilt Christmas day...

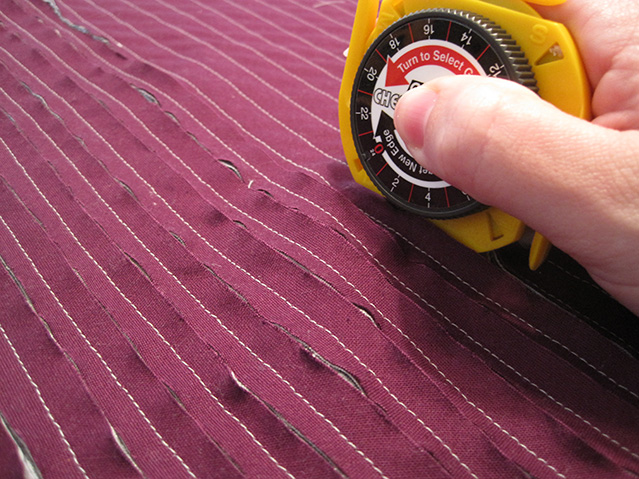
Close up of the cute quilting...Thanks,
Jess


Photobucket

Wednesday, September 14, 2011

Winner and a fabulous mini quilt


Here are the winners from our Sprinkles giveaway HERE.  We wanted to know about your fiesty kids!!! :)  The two OH SO FUNNY winners (Erin please contact us!):
Blogger Erin said...


I have a fiesty one too! It is my youngest, I have told people that it is a good thing he was not my first or I wouldn't have had anymore! One night I was putting him to bed and he was being a little sassy. I told him to get in bed and he says, "you aren't the boss!" I fired back "oh yes I am." His response "no you aren't, God is!" How can you argue with that?
September 8, 2011 6:50 PM
Blogger Pamela said...
I have a feisty and fierce one, too - youngest of 5 girls! She definitely makes us laugh and we tease her about the funny things she said when she was little. "I'm not used to this family yet!" is one she will never live down. She's now a senior in high school!
September 7, 2011 10:41 PM
Leona from Leona's Quilting Adventures (I love her name by the way...) has a great modern mini quilt to share.  It's all solids, and in fact my next quilt in my sketch book is all solids!  Anyway, check out her finished quilts (I loooove when ya'll have this tab!) I especially love this castle peeps mini, so cute!!  Leona also has an Etsy fabric shop, small but I did see Heather Ross and Denyse Schmidt's that are hard to come by!

Lately I have lived in the world of perpetually behind with many of my blocks swaps and bee blocks. My goal is to get caught up over the next several weeks and start posting everything. I think the changes from moving and transitioning into a new environment caught up with me for a while. Change is good, but sometimes the brain just has to re adapt!!
Over the long weekend I worked on Pam's Quilt. The center of the quilt is finished and needs to have three borders added to it before it can be sent off to be quilted.
The mini for the "For Love of Solids" swap on flickr is almost completed. My secret partner loves purples and her quiltie reflects her favorite color!! One of the things that makes swapping fun is that it makes me push the envelope a bit more with each new project. The Bee Blocks, Blocks Swaps and flickr swaps challenge me because most times I have not attempted the project or process before. For the Love of Solids swap is a perfect example of the road less travelled. This project is improvised from basic instructions that began with a block from the book "Thinking Outside the Block." This is the first block that was created for the mini quilt. A simple improv block for the beginning of a modern quilt.
Nine blocks were created following the same process and alternating the purple to plum color pallet. Several blocks that I made didn't turn out as nice as I would have liked, so they met the trash can!! This picture is of the first four that were acceptable.
This is an initial layout of the nine blocks that ended up in the quiltie. Each block varies in color and placement of the strips. Through the process, which was very fun I decided that somewhere down the road I would like to make a full size quilt with larger blocks...and perhaps the intermingling of Wonky stars!
The interesting thing about sewing the blocks together is that it felt like I was creating a whole piece of fabric. The blocks as they merged (and as you can see their orientation changed) really complimented each other. The straight line quilting started in the center with a triangle that I followed around and around, then ran off the edge of the fabric. Two secondary sections of quilting ran parallel and horizontal to the center triangle. It is pretty amazing in person and will be difficult to let go of once it has to be mailed. 
The back of the quilt.
There are sometimes moments when I step back and look and think "did I do that?" A plum binding will be added and mailed with some purple goodies and a rainbow colored pincushion.
Work starts up again tomorrow. The laundry is done and even Chloe dog had a bath this weekend! She loves to smell everything and roll in the grass outside. The poor little dog had a bit of a green tinge to herself before her bath!!
My goal for the next several weeks is to get caught up with all of the overdue blocks that should have gone out in the mail many many weeks ago!!
Have a happy week and Happy Quilting!!

Photobucket

Wednesday, July 20, 2011

The Undercover Crafter shares wonky stars!

Hollie from The Undercover Crafter is very talented! She's been creating practically her whole life.  Check out her Quatreflowers Quilt, so pretty!  If you'd like more eye candy see her flickr.  Make sure to say hi and see her blog...but check out these wonky stars first!

IMG_5023

Look what I just pulled out of the wash...

IMG_5014


My first commission is complete. Isn't it delicious? I really had such a fun time making this quilt for Nancy. Her brother recently welcomed a beautiful little boy into the world and this is her gift to her new little nephew. And I'm warning you now, I went a little overboard on the pictures.

IMG_5017


The original plan for the back was plain Robin's Egg Kona but I was just a tad shy on the yardage so I decided to add large squares of each of the fabrics from the stars on the front to help extend the width of the Kona solid. And I'm really glad I did. I think it added a lot to the back and showcases all the fabrics really well.

IMG_5022


I want to thank everyone who gave their input on both the layout and the quilting of this quilt. I loved all of the feedback. In the end Nancy won the Great Layout Debate (the quilt is for her after all) so the Central Park Zoo squares run diagonal through the middle and the subsequent rows are more orderly. As for the quilting, which sparked a little debate, I went with Natalie full force on this one. I favored Option #3 and then not only echo quilted around each star but I also echoed each long seam on either side.

IMG_5019


IMG_5020


I really love the patterns the quilting created. And I think on the next wonky star quilt (because I am sure there is another in my future) I may play more with echoing the stars both on the inside and out.

IMG_5024


I think the binding may be my favorite part of the quilt, though. I think the orange dots provide the perfect amount of contrast and color to the quilt. I really am dying to run back to my LQS to pick up some more yardage for my stash. I think it makes a terrific binding.

IMG_5033

IMG_5034


Alas, I think completing this quilt brings my Wonky Star Madness to an (temporary) end. I hope Nancy is pleased with the final outcome and this quilt provides her nephew with years of warmth and comfort.
Photobucket


Wednesday, April 27, 2011

Sir Bubbadoo's Chenille Quilt, must see!

For the winner of the Ole Frog Eyes giveaway scroll to the bottom of the post!

Today's feature Kristina is an all around crafter.  Her blog, Sir Bubbadoo, is a nickname of her cutie-pie boy Emmett.  She has all sorts cute projects like these darling stenciled onesies and these cute felt numbers.  She has amazing photos on her blogs, which just makes all the difference in the world to me!  She sells some of her creations in her etsy shop, all kinds of baby essentials.  Today we get to see this very cool technique in her chenille quilt!


I am sure you remember when I made this chenille cut quilt. Well ever since I made it, I couldn't stop thinking about it and wanting to make another one, and as luck would have it, there is soon to be another baby girl in the family, so perfect! (hopefully the mom doesn't mind me blogging about her new quilt! a sneak peek at what will be coming in the mail soon!!)


Following the same steps as I did with the last quilt, I used 1.25 yards of a fun flannel print, and 4 coordinating Kona fabrics (1.25 yards each). Since the flannel is such a busy print I wanted something more solid, less busy, but still striking for the back and opted for purple over pink, as girls just have way too much pink sometimes. I used a gray thread instead of white because I thought it blended better with the flannel.

This time though, I decided to get the Olfa Chenille Cutter (you can find them on amazon or joann fabric) instead of cutting all the rows by hand, because seriously my hand could not take another round of that.


How this puppy works. (no i didn't read the instructions that came with it, perhaps it says all of this...) So you pick which "leg" fits inbetween the rows the best, I found L to work better than LL, and you just slip it in between the flannel and the first layer of Kona and off you go. I had to cut about 1/2 inch into each row to get the cutter started, otherwise it sorta tugged on the fabric to start, and even though it would get covered with bias tape and fuzz in the wash anyway, I thought this method was best.


About 1/3 away across the blanket, it really started to hurt my hand and I had to use a lot of force to get it to go, well guess what, as soon as I turned the blade to a new cutting edge, it magically was super easy again. I used 3 cutting edges to do the whole blanket (you turn the dial to get a new edge). The cutter is a lot easier and much much faster than doing it with scissors, but your hand still hurts a little from gripping this thing and I don't think that it cuts as nicely/evenly as scissors. You don't notice it after it is washed, but it didn't cut exactly down the center - but this is probably me not holding it centered? But bottom line is yes I will always do it this way over scissors. The $20 is totally worth saving your hand for another few years.


I don't know why but I love just running my hands over the quilting on the flannel and over the cut fabric on the back, maybe there is something wrong with me! But I love how it turned out and almost don't want to give it away!


The winner of these Riley Blake fat quarters AND a month membership to try out Ole Frog Eyes is.....

Congratulations to Debra!  To see if you also won, check out Lily Pad Quilting right now!

Blogger Debra said...
I'm already a follower!
April 22, 2011 11:15 AM
Delete 


Photobucket

Wednesday, March 9, 2011

First Quilt completed by Ashley...


Don't you just love seeing people falling in love with quilting. Don't you sort of want to warn them and stop them in their tracks. Seriously! Quilting and fabric collecting is so addicting! So welcome Ashley, this is her beautiful first quilt finish!  I love these colors. I am excited to see Ashley's love for quilting grow.  Go welcome her at her blog Our Anchored Adventure.

As a little girl, I remember my grandmother sewing most anything (clothes, draperies, etc.) and making quilts by hand. She's the one who taught me to sew using her old Kenmore machine. When I was nine, she made me a quilt for my twin bed. I went with her to the fabric store and chose the fabrics I wanted her to use. I think it was then that I fell in love with fabric! The quilt turned out beautifully, and fast-forward eighteen years 

- I still cuddle up with her quilt on my couch with my husband and watch movies. Little did I know the spark that was struck when I was a child would grow into a love for quilting. These many years later, it was my mother-in-law who taught me how to quilt, who could have guessed it - on an old Kenmore machine very similar to the one I learned to sew on. This is the first quilt that I have completed. 

This particular pattern is said to be the "Potato Chip Pattern," because you can't make just one! It took awhile in the making... this quilt has been through my husband's graduate school years, a 1,400 mile move, and the pregnancy and birth of my 7 month old little boy. For my next quilt, I'm hoping to make him a quilt for his first birthday!


Photobucket

Wednesday, March 2, 2011

Little Bluebell's LOVE Quilt

Hey all!  Welcome to Quilt Story :)  Today we're featuring Adrianne from Little Bluebell Love quilt.  And it is definitely one to LOVE :)  She's got a great list of finished quilts, it's fabulously listed so you can see the image of each quilt and then she has a link to each time she blogged about it.  Genius. :)  Great little quilting blog so make sure to stop by Little Bluebell.


This is "Love" and it is brought to you by the Beatles, late nights with my sewing machine, chocolate, and a vanilla latte or two.


Love's Story:
I have a long list of "want to do" quilts.

You know how it goes, you see a quilt you love, you're inspired and you add it to your "list".  You can't start it now.  You don't have the fabric you need.  You're in the middle of another project.  You just can't.  Not right now.

This quilt never made my list.  One day it all came together in my head.  The Love fabric, the appliqued circles, the scrappy border and white, lots of white.  I just went for it.  I started cutting, ironing and piecing.  It was liberating!!

Try it.  The very next time you have a quilt idea, just go for it!!


Thank you so much for all of your suggestions on the previous "Love" post.  I went with aqua binding and free motion quilting, and I totally changed my mind on the backing fabric.  It was just too busy.  I may use the fabric to make some lounge pants from Amy Butler's book.  An appropriate pairing I think!  : )

-A


Photobucket

Friday, February 18, 2011

A Cancer Killing Quilt for Rosemarie


Do you know Emily from Mommy's Nap Time?  She's been a great reader for quite some time, we always have so much fun checking out her projects.  She participates in a lot of great swaps, like a Doll Quilt Swap (eeek for cuteness!) and making adorable things for her adorable girls.  Today she's got a very personal story to share with us showing us once again how quilts can bring much more than warmth.

These two quilts were made with love, with the help of 33 people across 7 countries. Here's how they came to be. My niece Rosemarie is four years old and has spent three of those years fighting a battle against cancer. She's a sweet tough little girl, and her treatments take her and her parents several hours away from home 4 days a week. I have wanted to make Rosemarie a quilt since I started quilting about two years ago, but I knew it'd be a big process, not only emotionally, but also because I knew I couldn't make just one quilt; I'd need to make one for her big sister Katee too!


Feeling like this was too big of a project to take on myself, I started a flickr group and enlisted the help of my new online sewing friends. They sure stepped up! In a matter of weeks I had enough blocks sent to me to make two beautiful quilts (some generous friends even sent extra fabric along to help with the backing and binding!). I'd never known what connections could be made online. I've never met a single one of these ladies in person, but they poured out their love and prayers into each block. My sister's best friend even made one!

These quilts came together with so much prayer stitched in. They were only my second and third tries at free motion quilting and it was such a peaceful prayerful process. By Thanksgiving, they were both assembled needing only the binding to be sewn down, we brought them along on the road trip home so that my neice Katee (the 10 year old) could help me sew the binding of her sister's quilt. The last step, before finishing the bindings, I used a fabric pen to write prayers for the girls in the seam allowances of the bindings. Even if they don't know exactly what's written there, they will always be able to know that they are not only figuratively, but also literally wrapped in prayer.


I know that these quilts can't really bring healing to Rosemarie. I know that they can't cure the loneliness that Katee feels when her family is away from her for her sister's treatments. But what these quilts can do is bring the world together in prayer, and in love. I hope that the girls continue to remember that. Thirty-three ladies put a bit of their hearts into this project. I pray that the girls will always be able to feel that love.

Rosemarie & Katee with their quilts

Thanks for taking the time to read my story!

~Emily
Flickr: emedoodle
Blog: http://mommysnaptime.blogspot.com/
Photobucket

Wednesday, January 5, 2011

Calypso Swing Quilt

Today I've got the first Quilt Story for the year 2011, yahoo!!  One of our new readers, Cara from The Official Mark Cesarik Fabric Fansite, sent us a link to her first quilt (seriously so many people make amazing first quilts!).  Not only is it her first, not only did the design it herself, but her fiance is the designer of the fabric!!  Talk about a match!  Here's Cara:

I finished my first quilt last night! I really love how it turned out. Quilting is addicting - I think I'm hooked. I fell even more in love with Calypso Swing through making this quilt. The designs looks really great together if I may say so myself... I'm trying to convince Mark he should started quilting but he doesn't want to. Oh well - more fabric for me


The back of the quilt is just large rectangles of fabric pieced together. Next time I want to do something a little more fun for the back.


I designed the quilt to show off the fabric "Shuffle" and hand-quilted to emphasize the circular pattern.


Along the rest of the quilt, I hand-quilted circles.


Thank you for all of your help and suggestions with binding. I actually really ended up enjoying the process of sewing the binding onto the quilt. My mitered corners could use a little help, but I'm sure I'll get better with each quilt.


If anyone is interested in the pattern for this quilt, I am happy to write a tutorial. Just leave a comment to let me know. Thanks for looking!
Photobucket