Today's feature Kristina is an all around crafter. Her blog, Sir Bubbadoo, is a nickname of her cutie-pie boy Emmett. She has all sorts cute projects like these darling stenciled onesies and these cute felt numbers. She has amazing photos on her blogs, which just makes all the difference in the world to me! She sells some of her creations in her etsy shop, all kinds of baby essentials. Today we get to see this very cool technique in her chenille quilt!
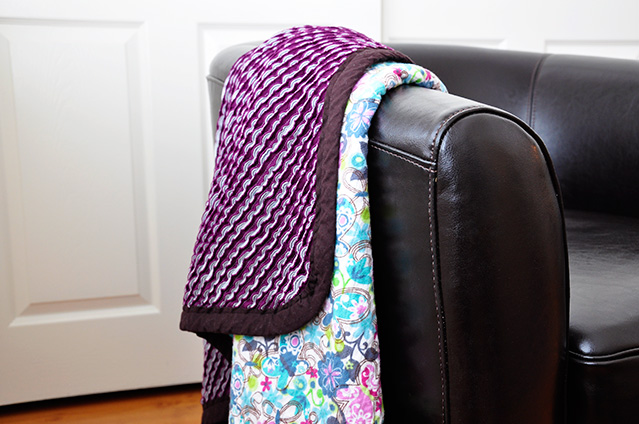
I am sure you remember when I made this chenille cut quilt. Well ever since I made it, I couldn't stop thinking about it and wanting to make another one, and as luck would have it, there is soon to be another baby girl in the family, so perfect! (hopefully the mom doesn't mind me blogging about her new quilt! a sneak peek at what will be coming in the mail soon!!)
Following the same steps as I did with the last quilt, I used 1.25 yards of a fun flannel print, and 4 coordinating Kona fabrics (1.25 yards each). Since the flannel is such a busy print I wanted something more solid, less busy, but still striking for the back and opted for purple over pink, as girls just have way too much pink sometimes. I used a gray thread instead of white because I thought it blended better with the flannel.
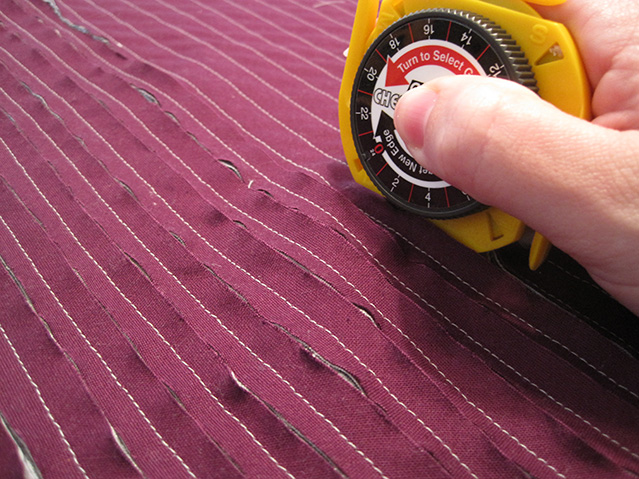
This time though, I decided to get the Olfa Chenille Cutter (you can find them on amazon or joann fabric) instead of cutting all the rows by hand, because seriously my hand could not take another round of that.
How this puppy works. (no i didn't read the instructions that came with it, perhaps it says all of this...) So you pick which "leg" fits inbetween the rows the best, I found L to work better than LL, and you just slip it in between the flannel and the first layer of Kona and off you go. I had to cut about 1/2 inch into each row to get the cutter started, otherwise it sorta tugged on the fabric to start, and even though it would get covered with bias tape and fuzz in the wash anyway, I thought this method was best.
About 1/3 away across the blanket, it really started to hurt my hand and I had to use a lot of force to get it to go, well guess what, as soon as I turned the blade to a new cutting edge, it magically was super easy again. I used 3 cutting edges to do the whole blanket (you turn the dial to get a new edge). The cutter is a lot easier and much much faster than doing it with scissors, but your hand still hurts a little from gripping this thing and I don't think that it cuts as nicely/evenly as scissors. You don't notice it after it is washed, but it didn't cut exactly down the center - but this is probably me not holding it centered? But bottom line is yes I will always do it this way over scissors. The $20 is totally worth saving your hand for another few years.
I don't know why but I love just running my hands over the quilting on the flannel and over the cut fabric on the back, maybe there is something wrong with me! But I love how it turned out and almost don't want to give it away!
The winner of these Riley Blake fat quarters AND a month membership to try out Ole Frog Eyes is.....
 Debra said...


